POS Guide
Set up terminals, manage products, process sales, handle shifts, and run end-of-day reports — the complete point-of-sale workflow.
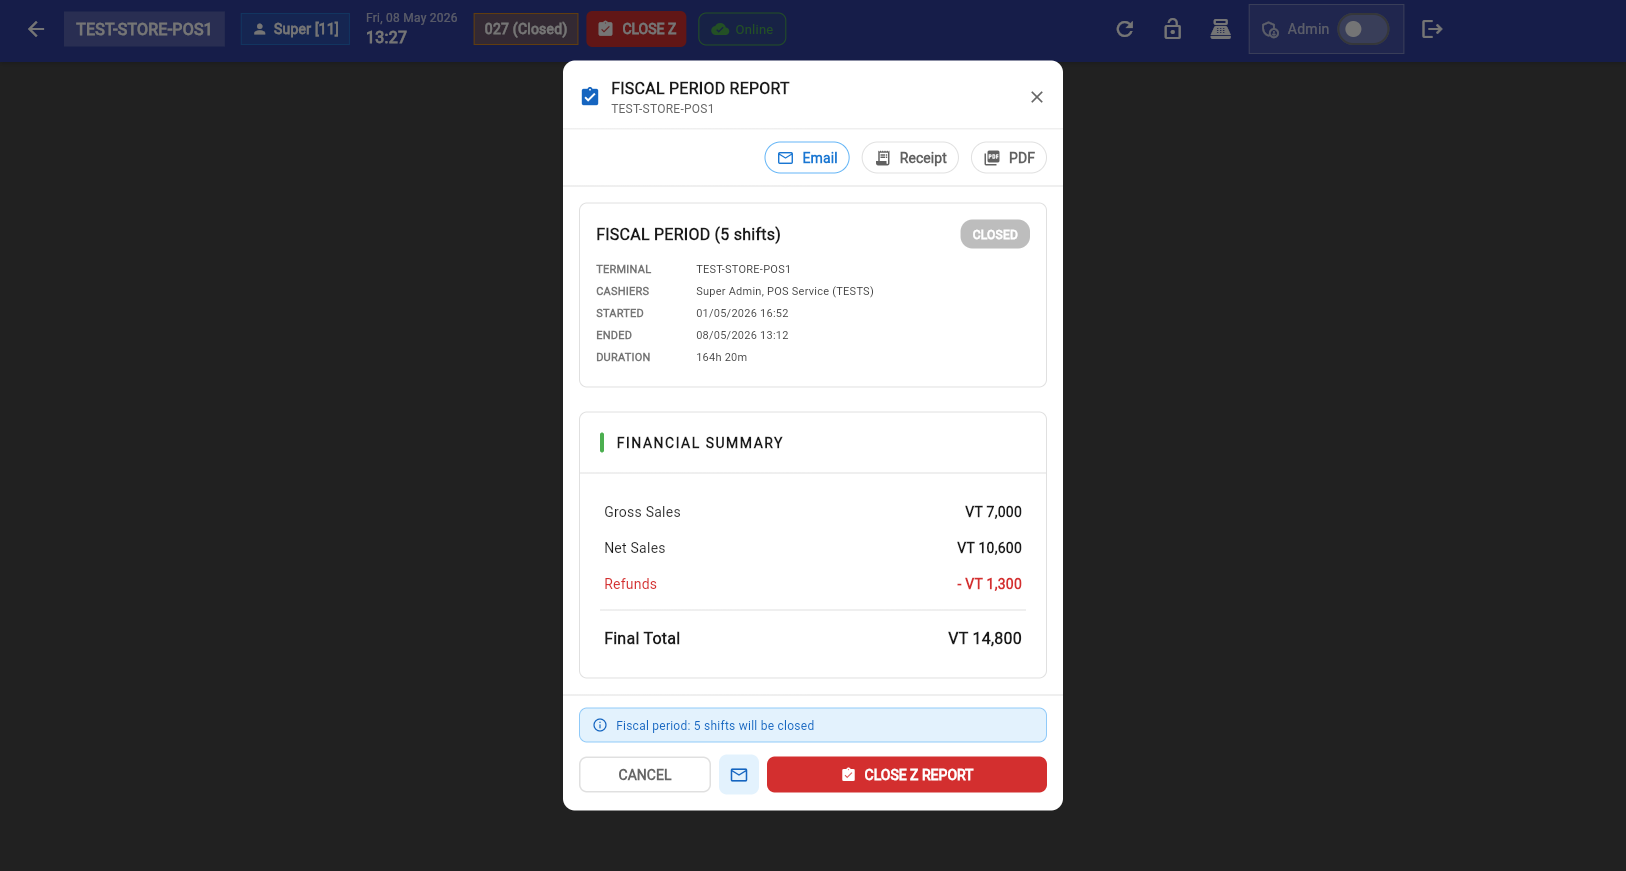
The POS follows a structured daily workflow designed for accountability and financial tracking:
📑 Sections
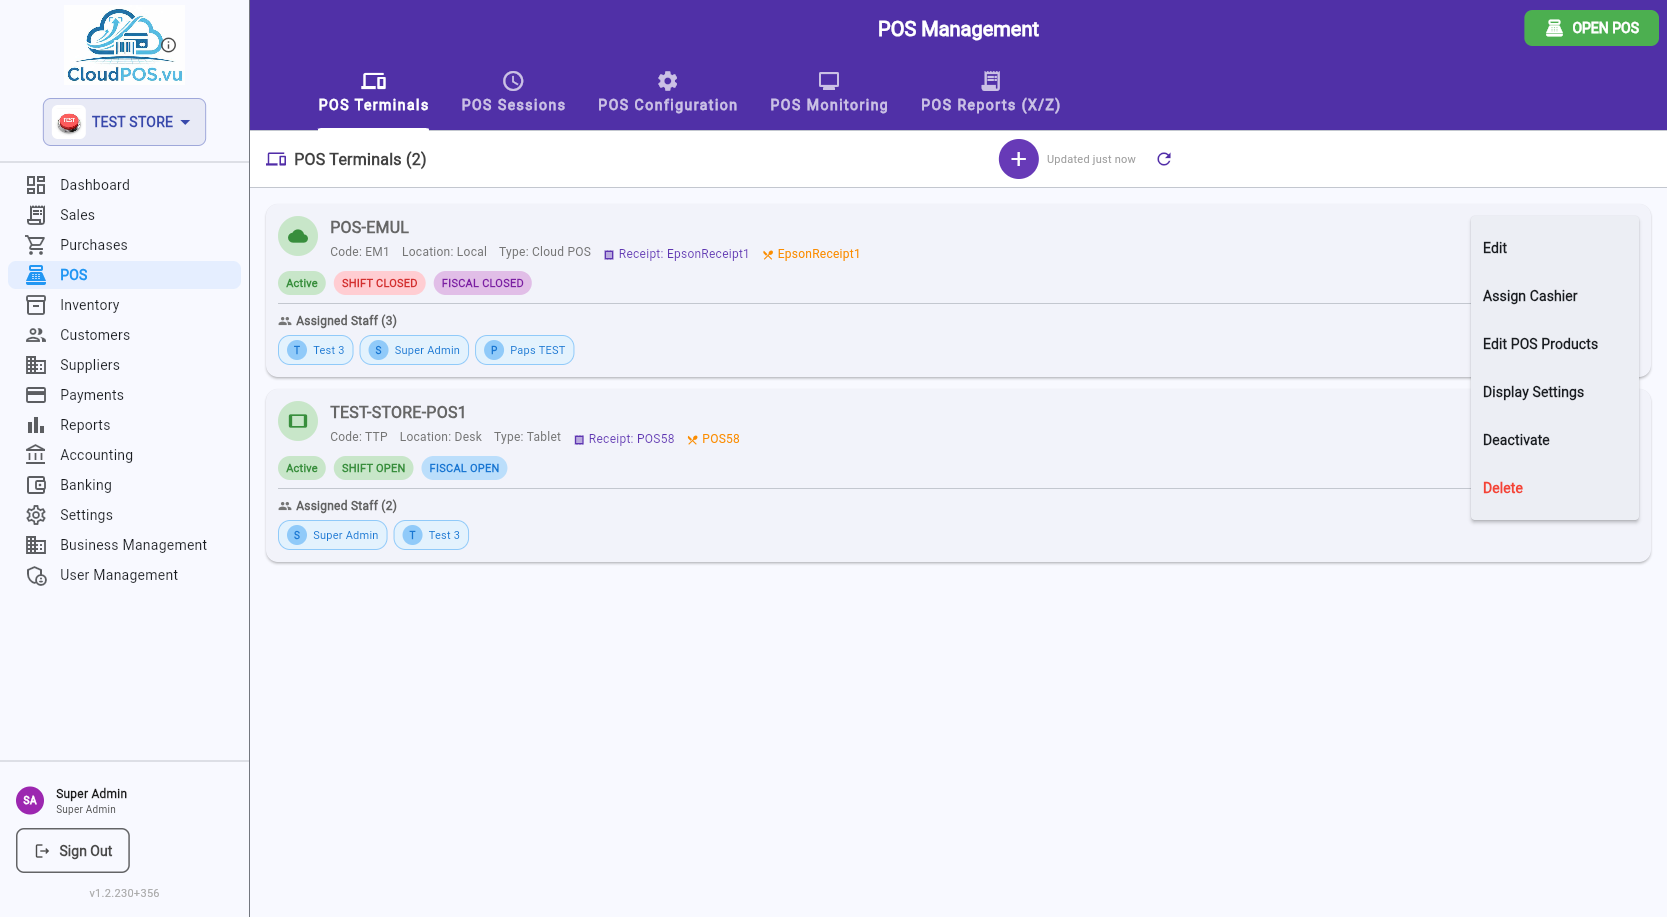
The POS Management screen lists all your POS terminals with their real-time status. Each terminal card shows:

Status Badges
Whether the terminal is enabled for use. Inactive terminals cannot open shifts.
Whether a cashier shift is currently running. A ⚠️ warning appears if a shift has been open for more than 24 hours.
Whether the fiscal period is open. The fiscal period closes when you run the Z-Report (End Day). A new fiscal period opens automatically with the next shift.
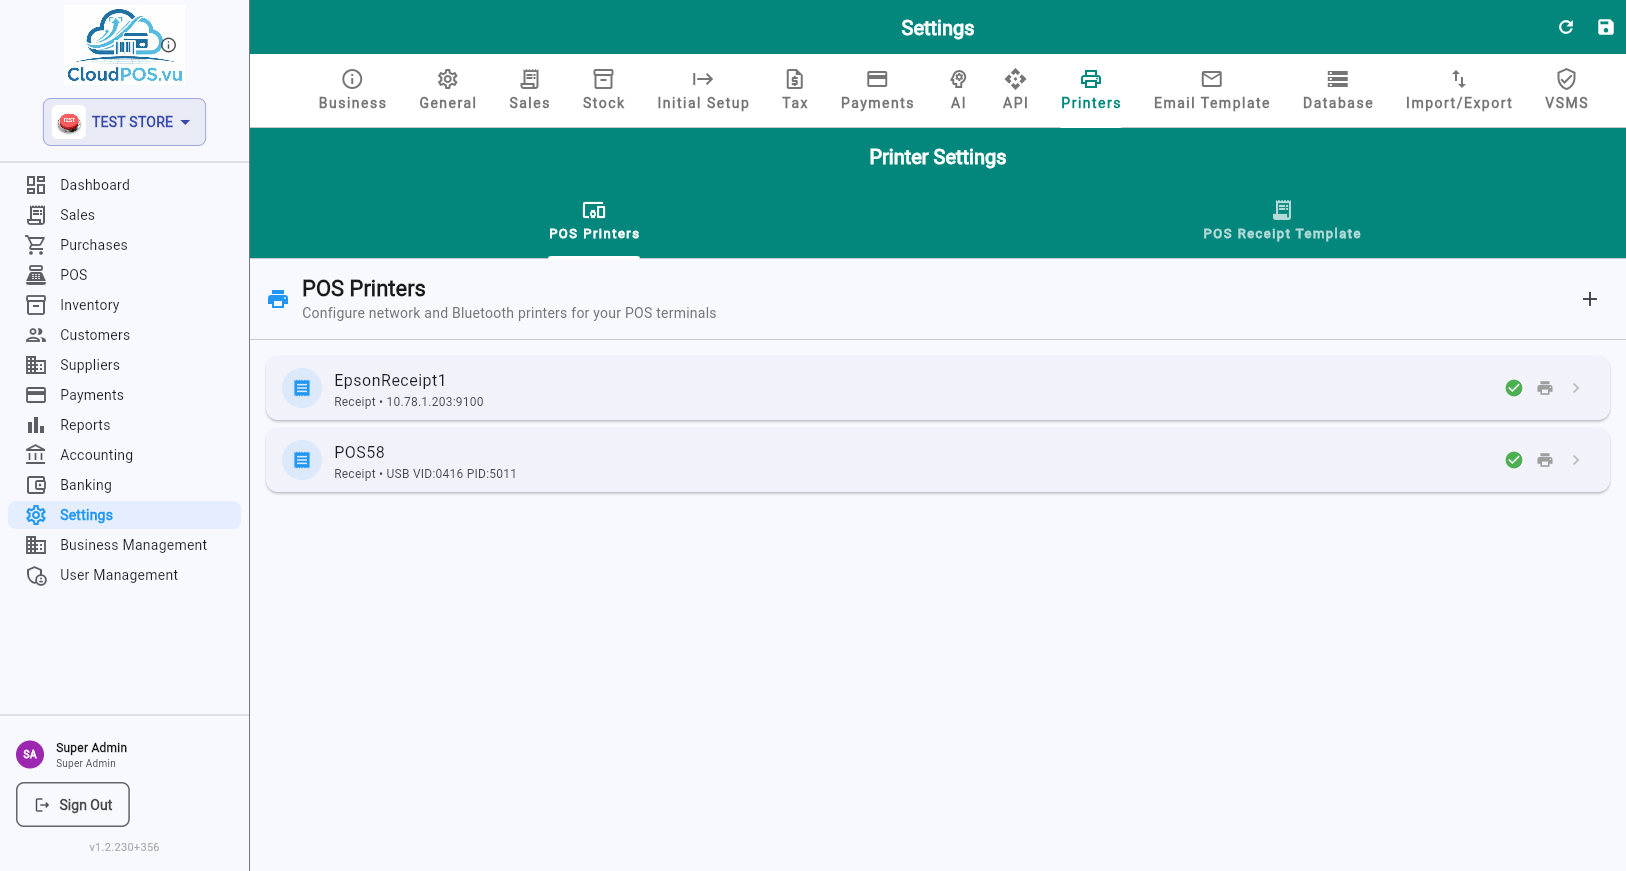
Printer Information
Each terminal card also shows which printers are assigned:
The printer used for customer receipts. Shown in purple with the printer name. If none is assigned, "No receipt printer" is displayed.
Kitchen or bar printers that receive order tickets when items are sold. Shown in orange. Multiple order printers are separated by •.
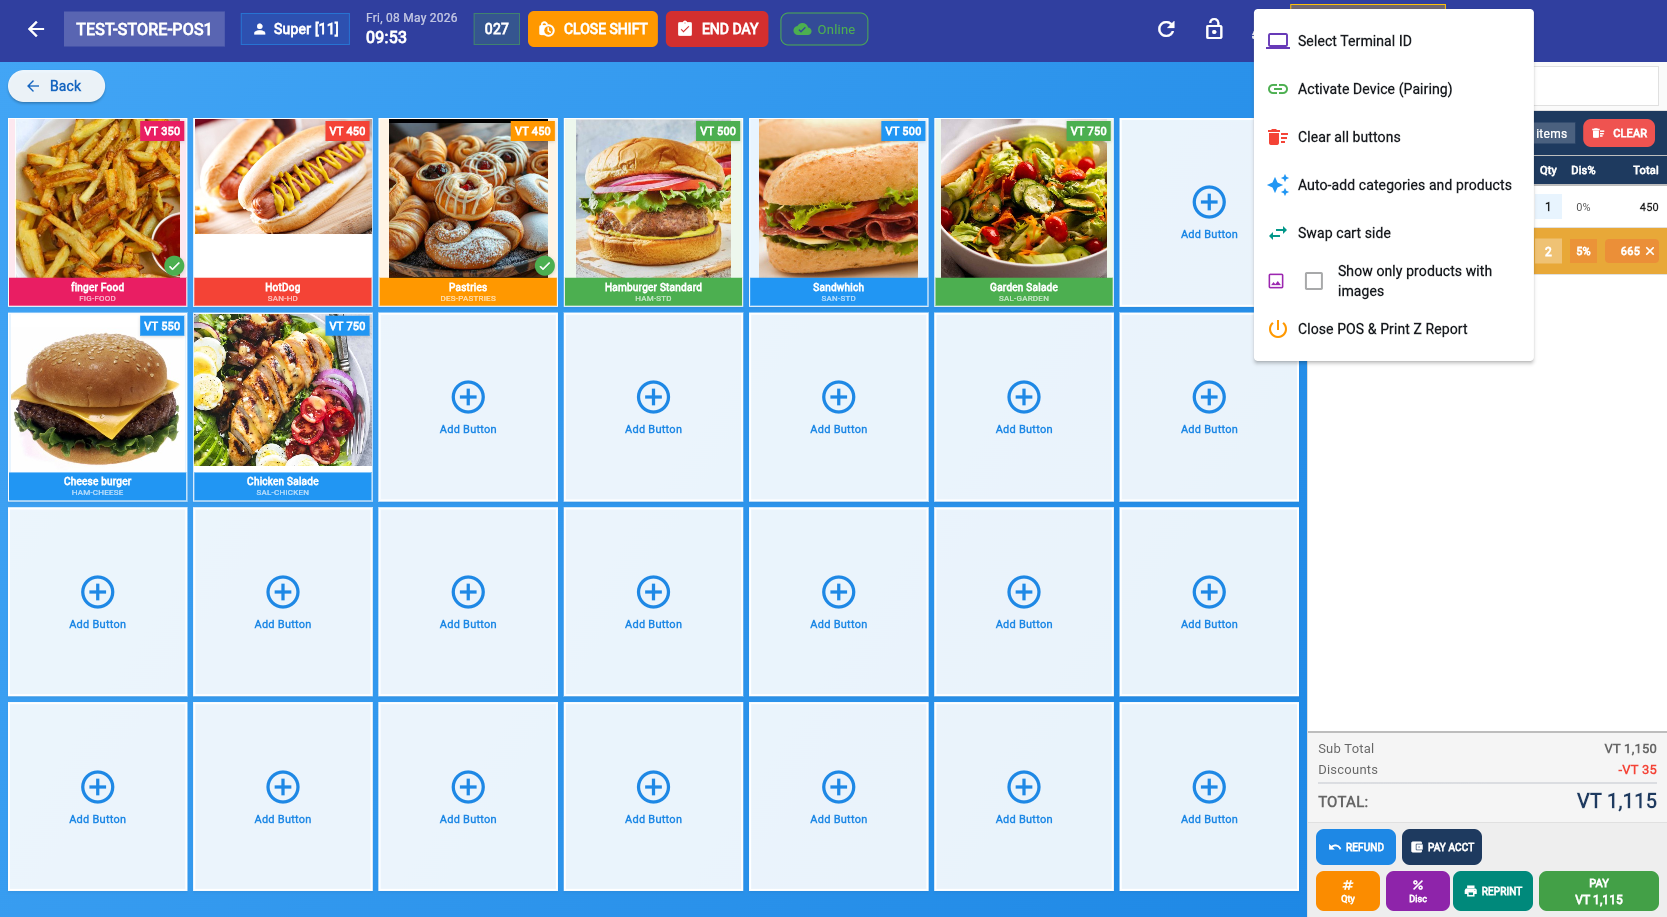
Terminal Actions Menu
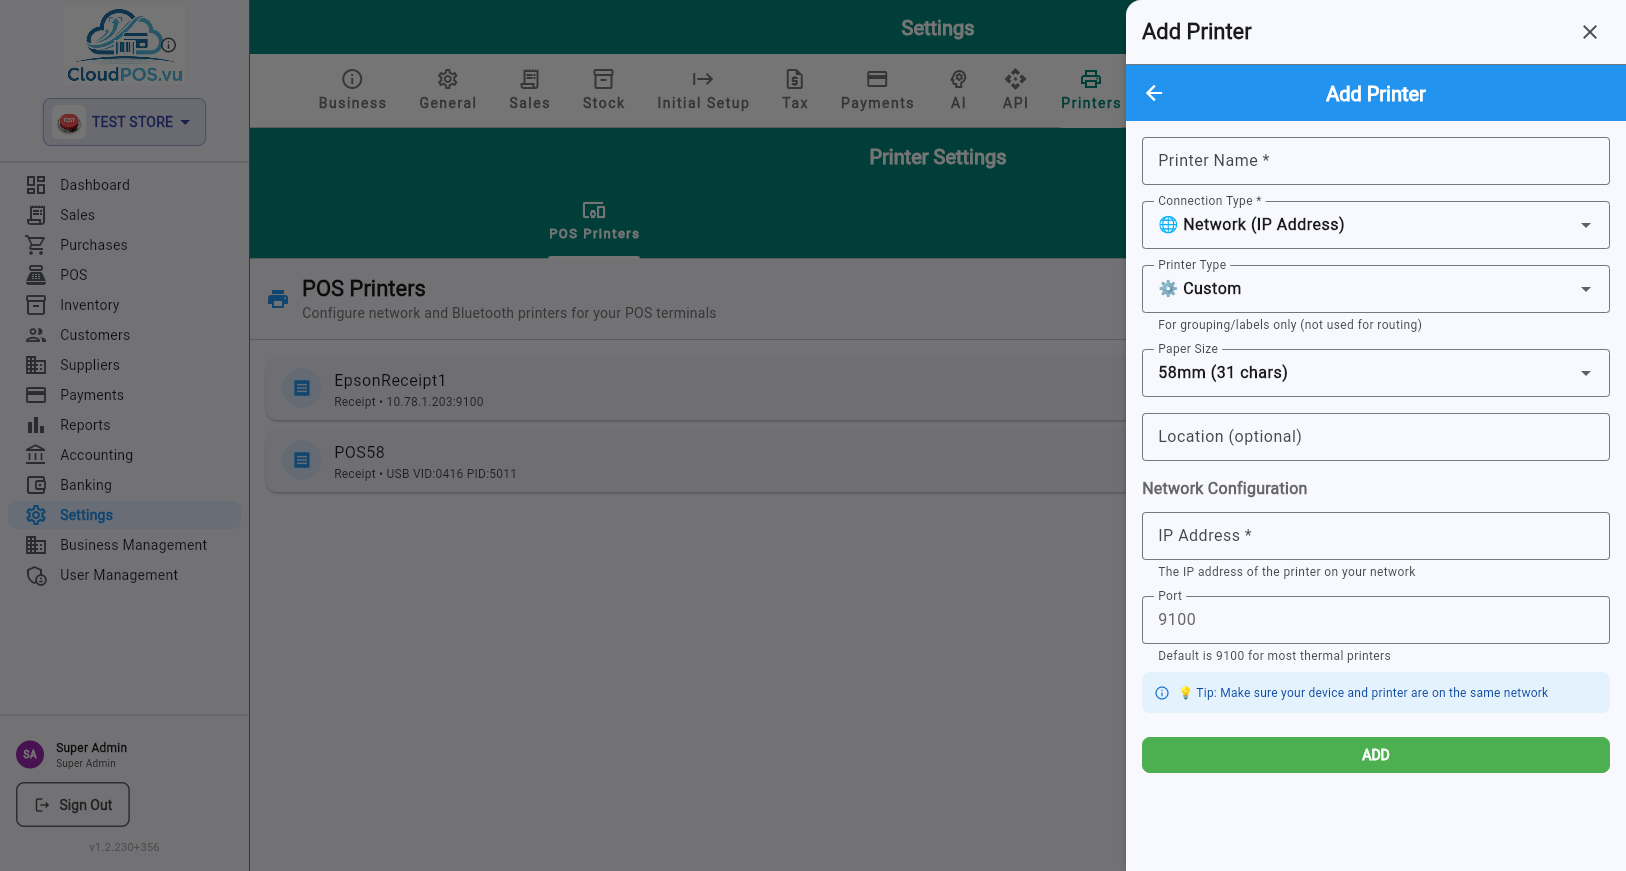
Click Edit from the terminal menu to configure all terminal parameters:
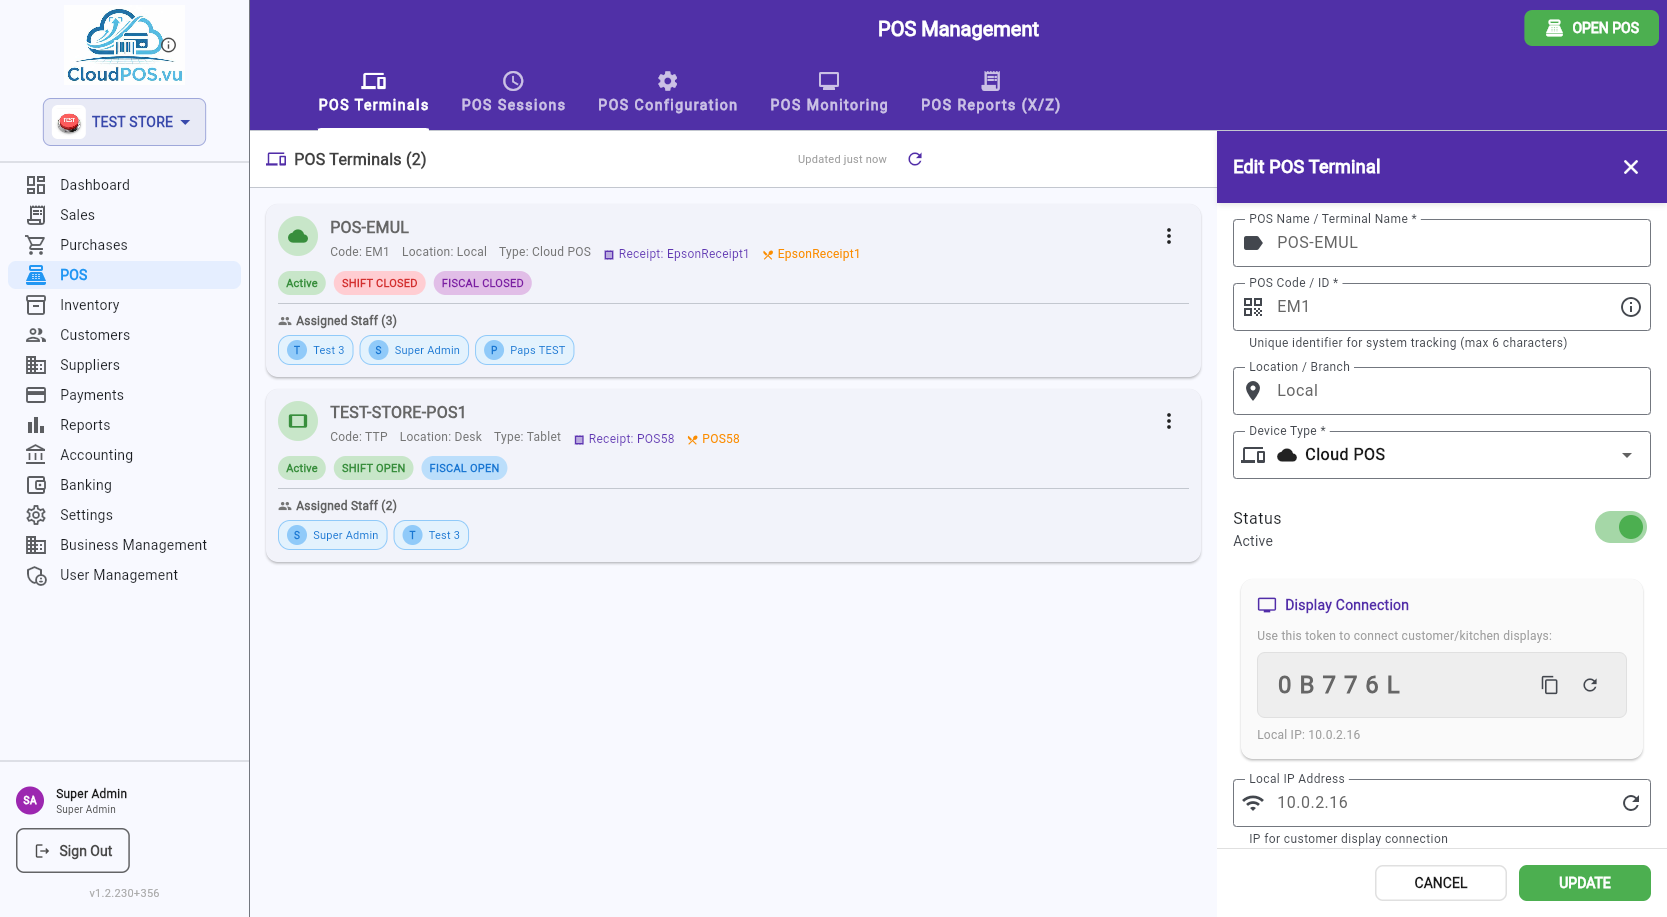
Parameters
Display name for the terminal (e.g., "Main Counter POS #1").
Unique 3–6 character identifier for system tracking. Cannot be changed while a fiscal shift is active.
Physical location (e.g., "Store 1", "Department A").
Tablet, PC, Mobile, or Cloud POS — determines the icon shown in the terminal list.
Active/Inactive toggle. Inactive terminals cannot be used.
Auto-detected or manual. Used for customer display connection.
Token + IP for connecting a second-screen customer display. Can be regenerated.
Assign receipt and order printers to this terminal.
Auto-generated code used to link a physical device to this terminal. Can be regenerated.
Device Pairing Flow
The info card at the bottom explains how to link a device:
- Create the terminal — a pairing code is auto-generated.
- Open the POS on the target device.
- Tap POS LOGIN on the login screen → enter the pairing code.
- The device is now linked to this terminal and business.
- Cashiers log in with POS ID + PIN for daily use.
Click Assign Cashier to control which staff members can log into this terminal using POS ID + PIN:
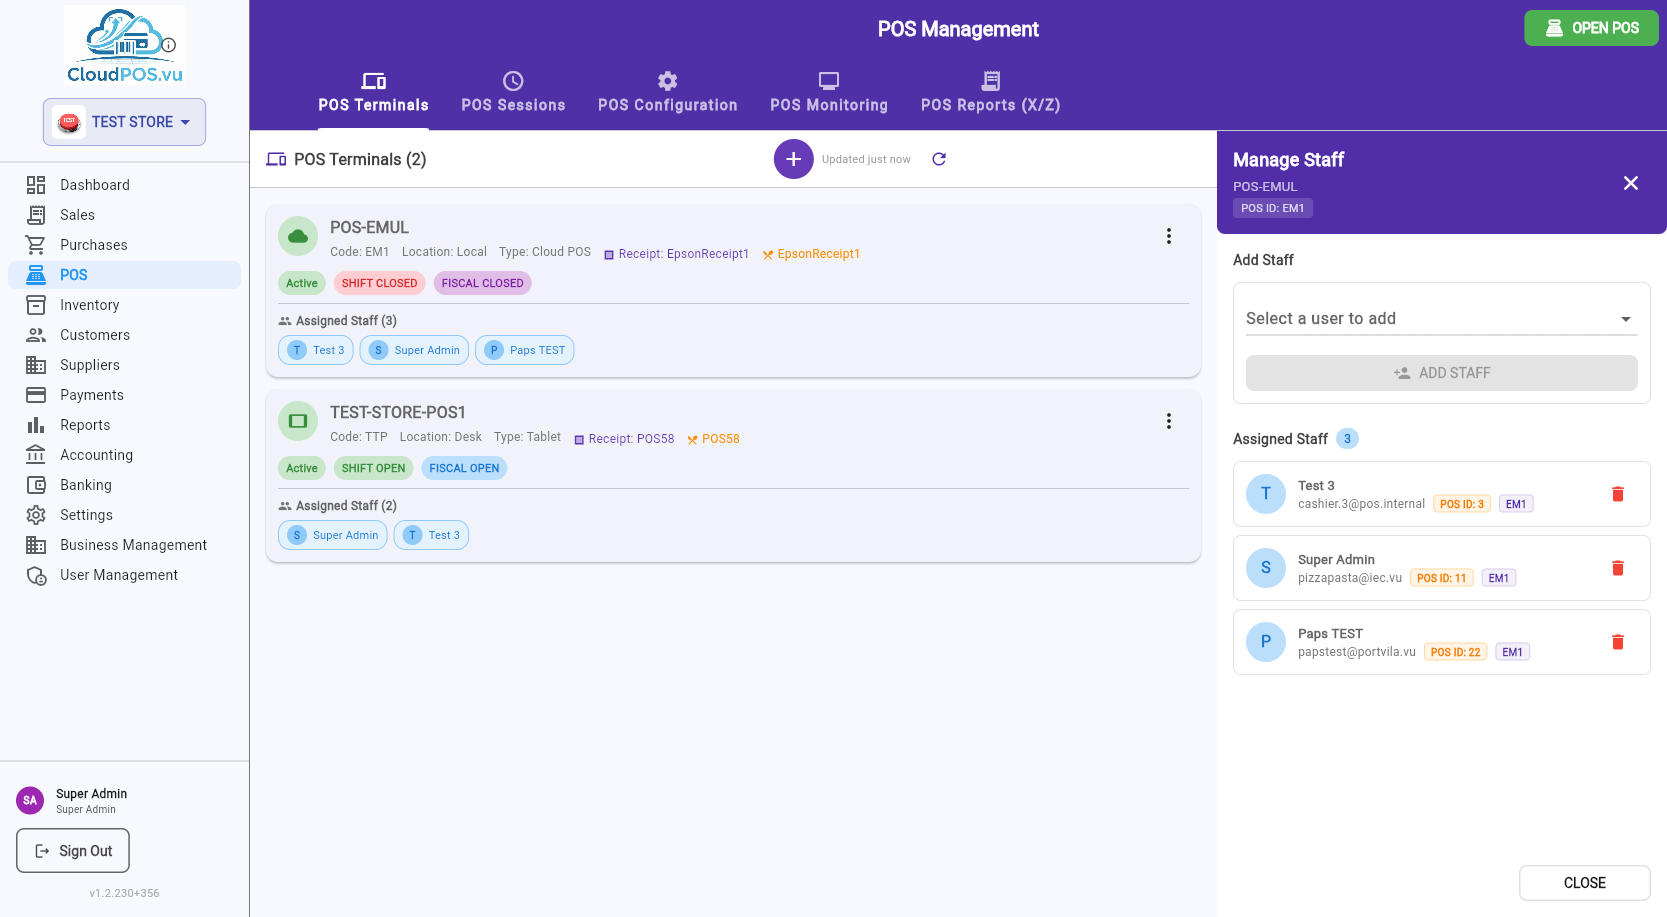
Add Staff
Select a user from the dropdown (shows all business users with their POS ID) and click ADD STAFF.
Assigned Staff List
Each assigned staff member shows their avatar, name, email, POS ID badge, and terminal code badge. Click the 🗑️ icon to remove a staff member.
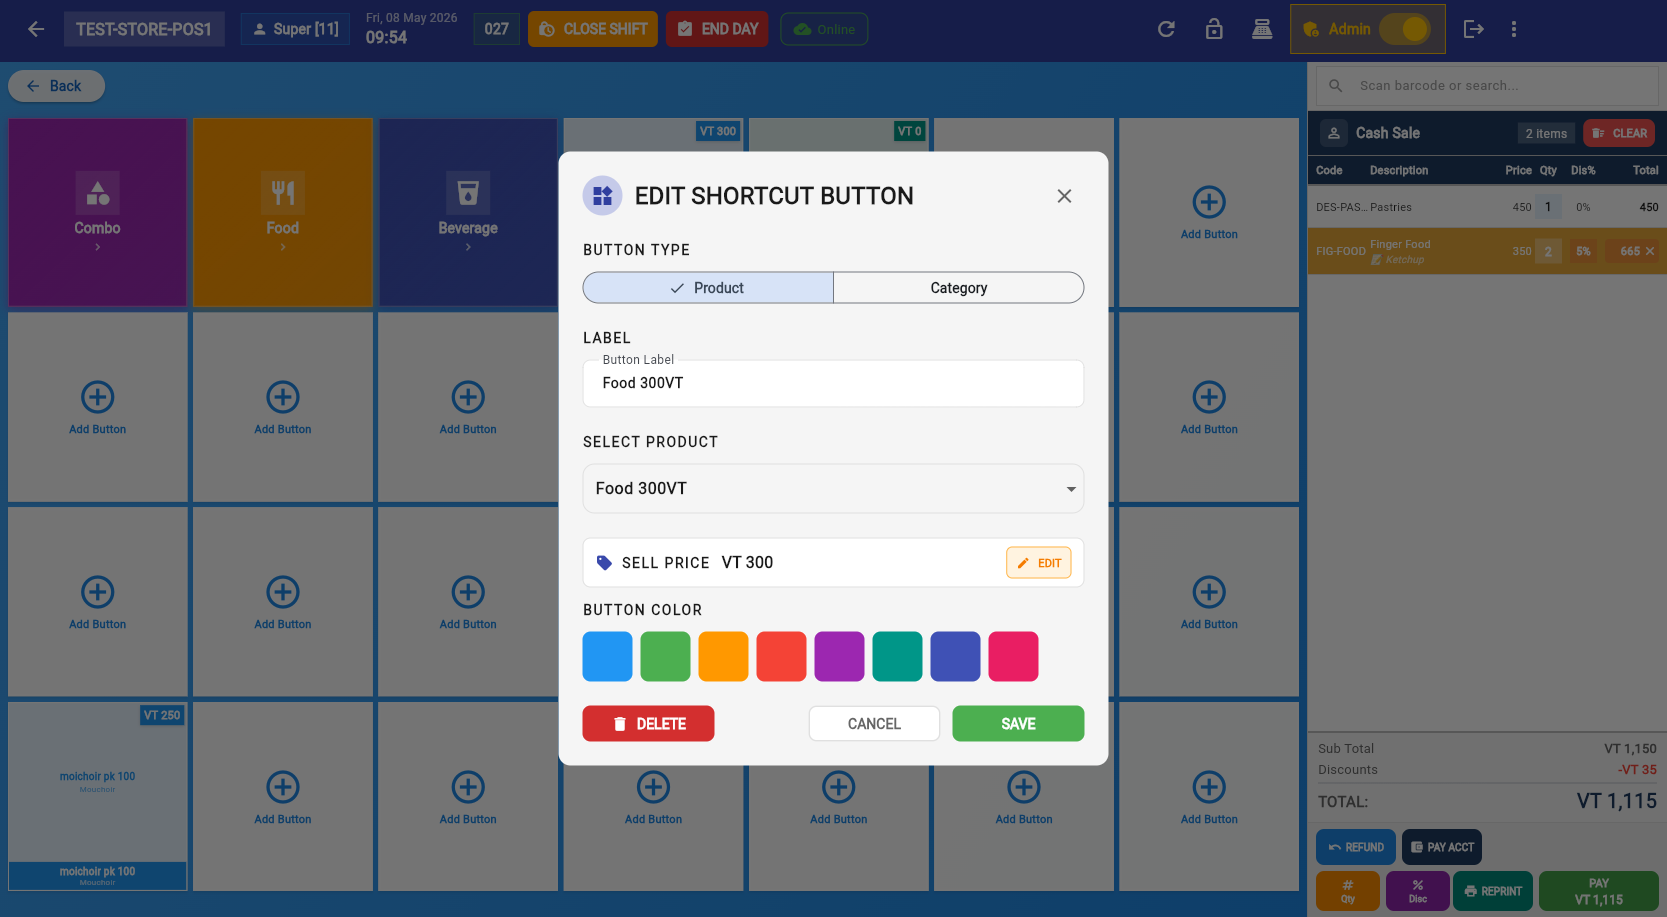
Click Edit POS Products to configure the button layout on the POS selling screen. The grid is 7 columns × 4 rows (28 buttons per page).
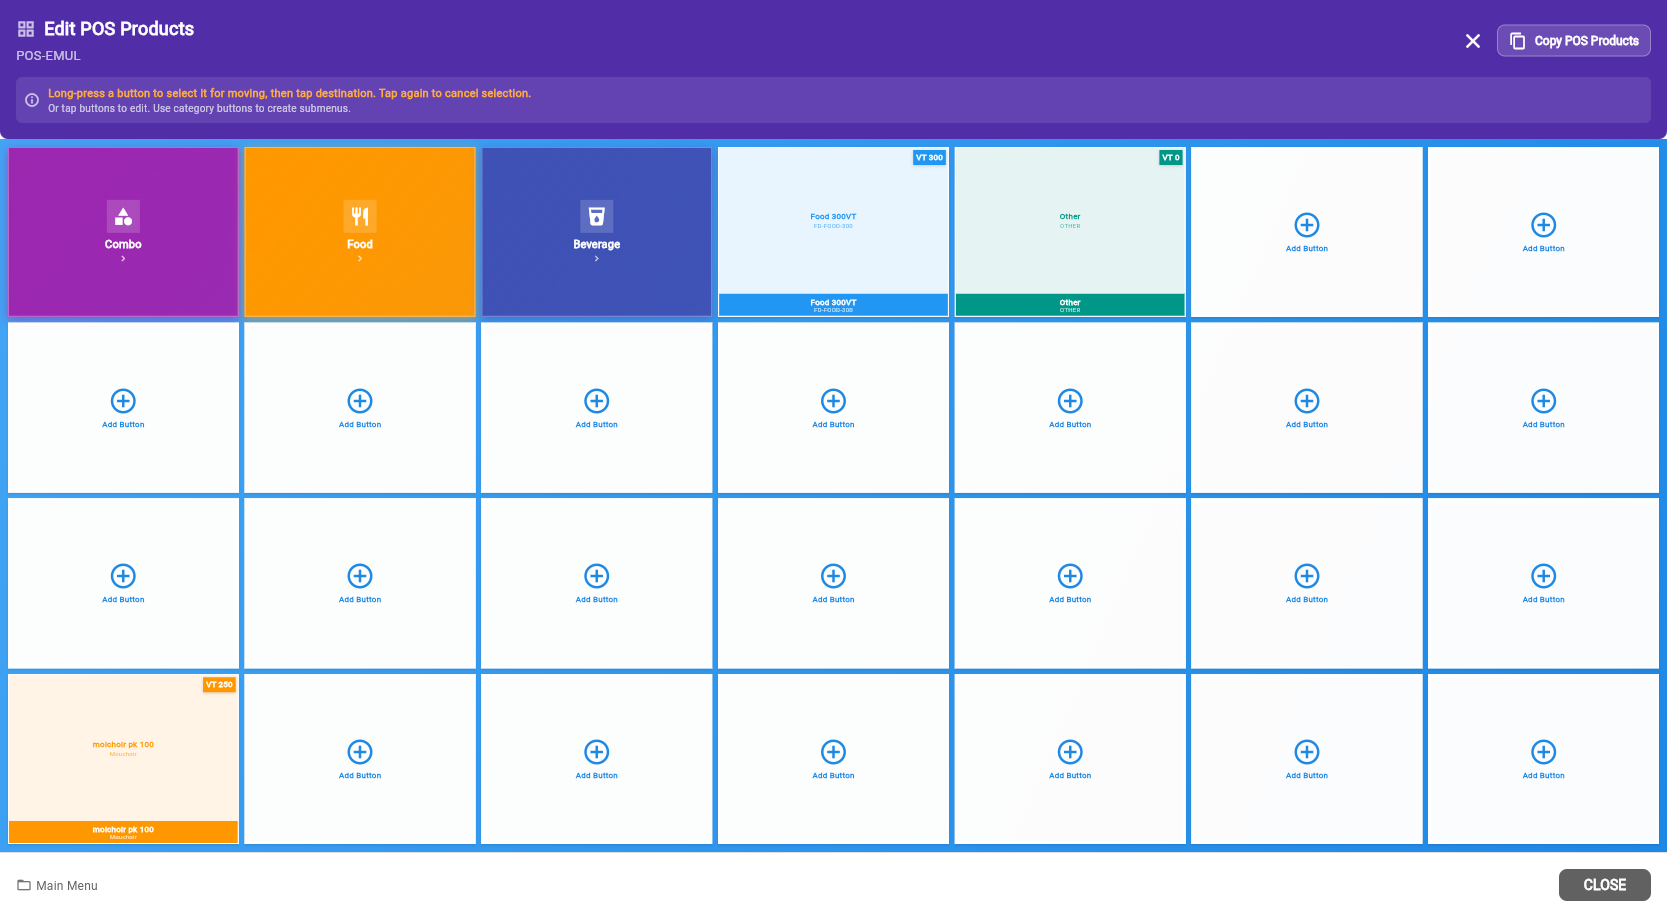
Button Types
Linked to a product. Tapping it in selling mode adds the product to the cart.
Opens a submenu grid. Use categories to organize products into groups (Drinks, Food, etc.).
Moving Buttons
To rearrange buttons on the grid:
- Long-press a button to select it for moving (highlighted).
- Tap the destination slot to move or swap.
- If the destination has a button, they swap positions.
- Tap the selected button again to cancel the move.
Adding a Button
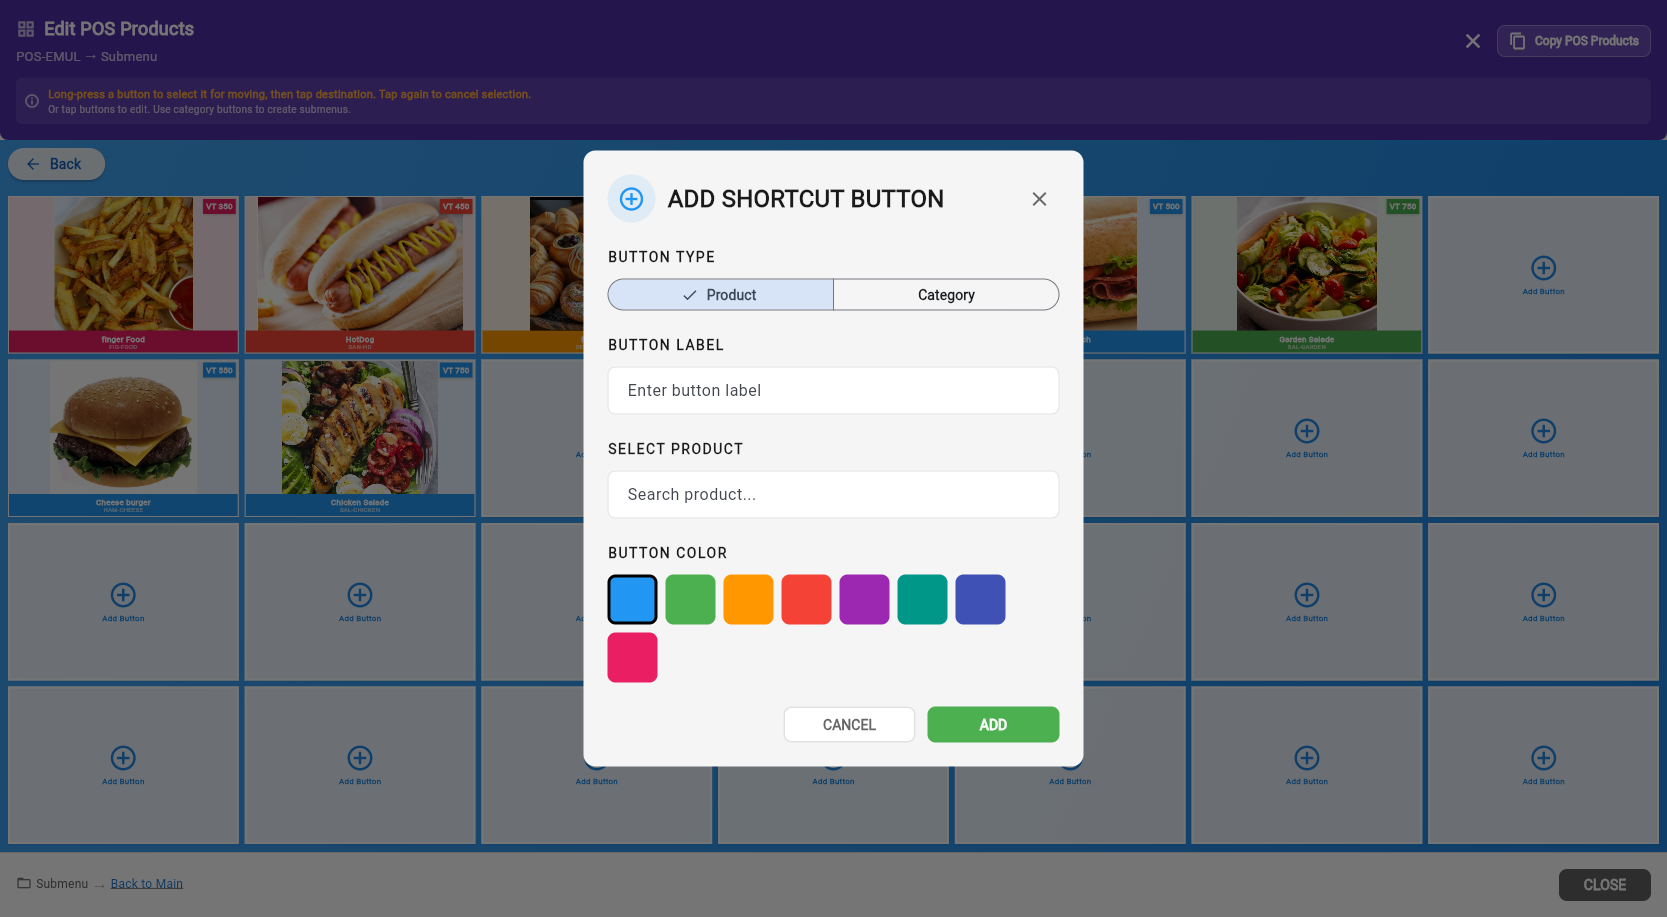
Tap an empty slot (or use the + button) to open the Add Shortcut Button dialog:
- Button Type: Product or Category (segmented toggle).
- Button Label: Text displayed on the grid button.
- Select Product: Search by name or SKU (Product type only). Usage indicators show if a product is already on other buttons.
- Button Color: 8 color options for visual organization.

Product Usage Indicators
Product is not on any button — good candidate to add.
Product is already on one button.
Product is on multiple buttons — may be intentional or a duplicate.
Copy from Another Terminal
Use the Copy POS Products button in the header to clone the entire grid layout from another terminal. This replaces all buttons on the current terminal — use with caution.
Click Display Settings to configure the second-screen customer display:
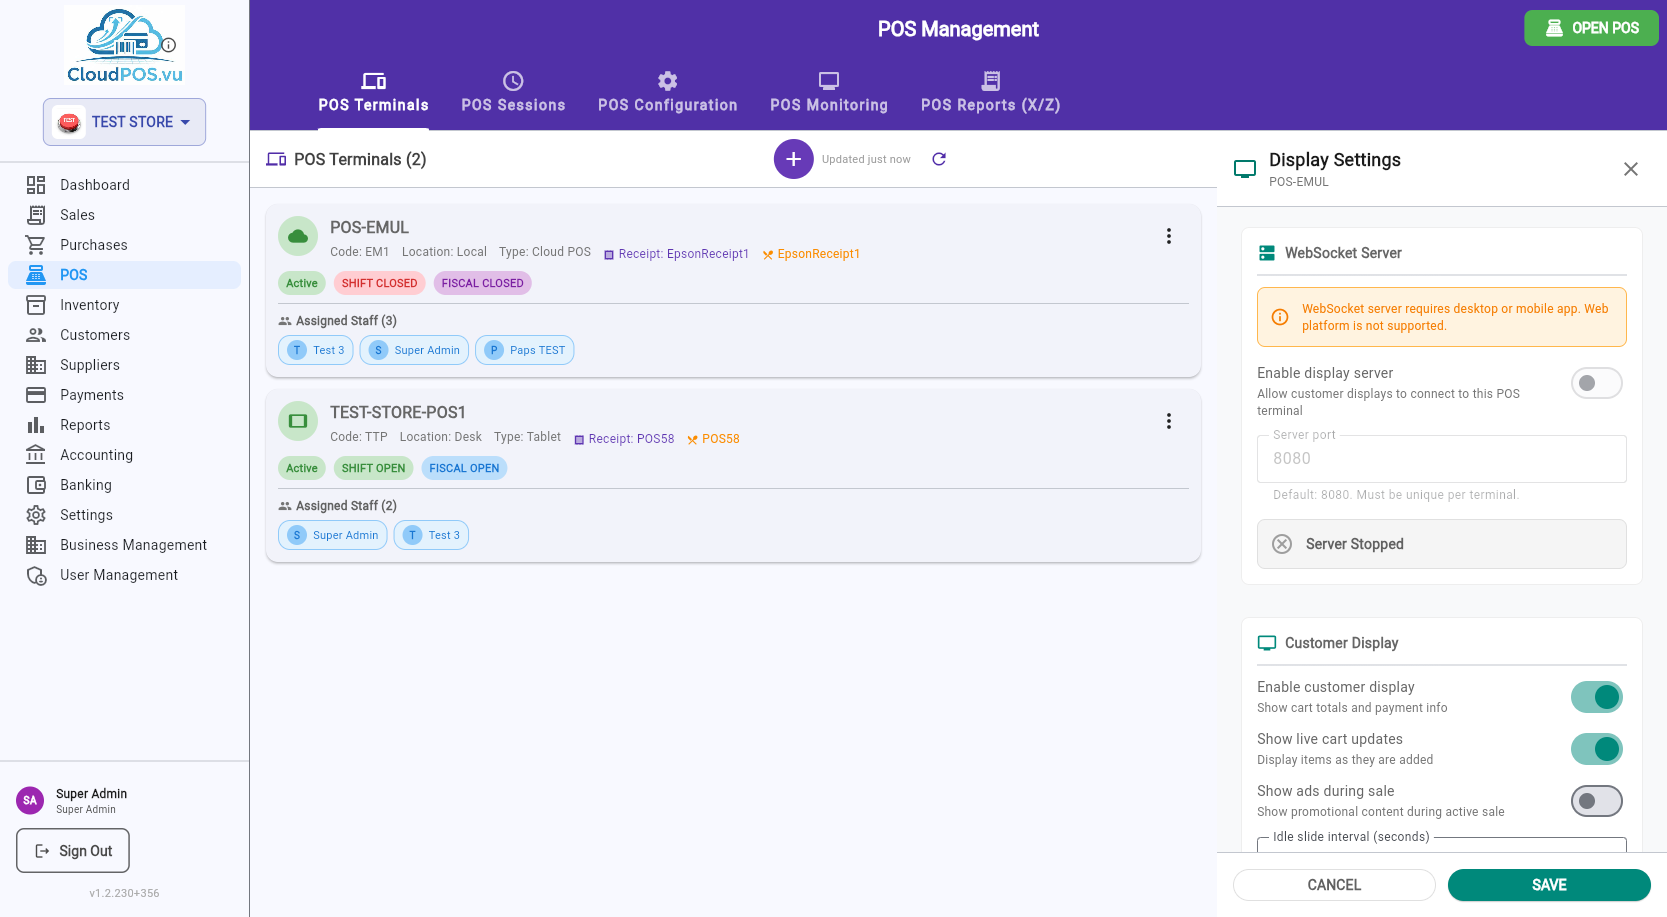
WebSocket Server
Enables a local WebSocket server that customer/kitchen displays connect to. Requires the desktop or mobile app (not available on web).
- Enable display server — start/stop the WebSocket server.
- Server port — must be unique per terminal (default: 8080).
- Server status — shows Running/Stopped in real time.
Customer Display
- Enable customer display — show cart totals and payment info on the second screen.
- Show live cart updates — display items as they are added to the cart.
- Show ads during sale — display promotional content during an active sale.
- Idle slide interval — seconds between image/video transitions when idle.
Idle Content
Configure images and videos to display when the POS is idle. Add URLs (one per line) for images or videos to show as a slideshow on the customer display.
CloudPOS.vu has two login paths from the login screen:
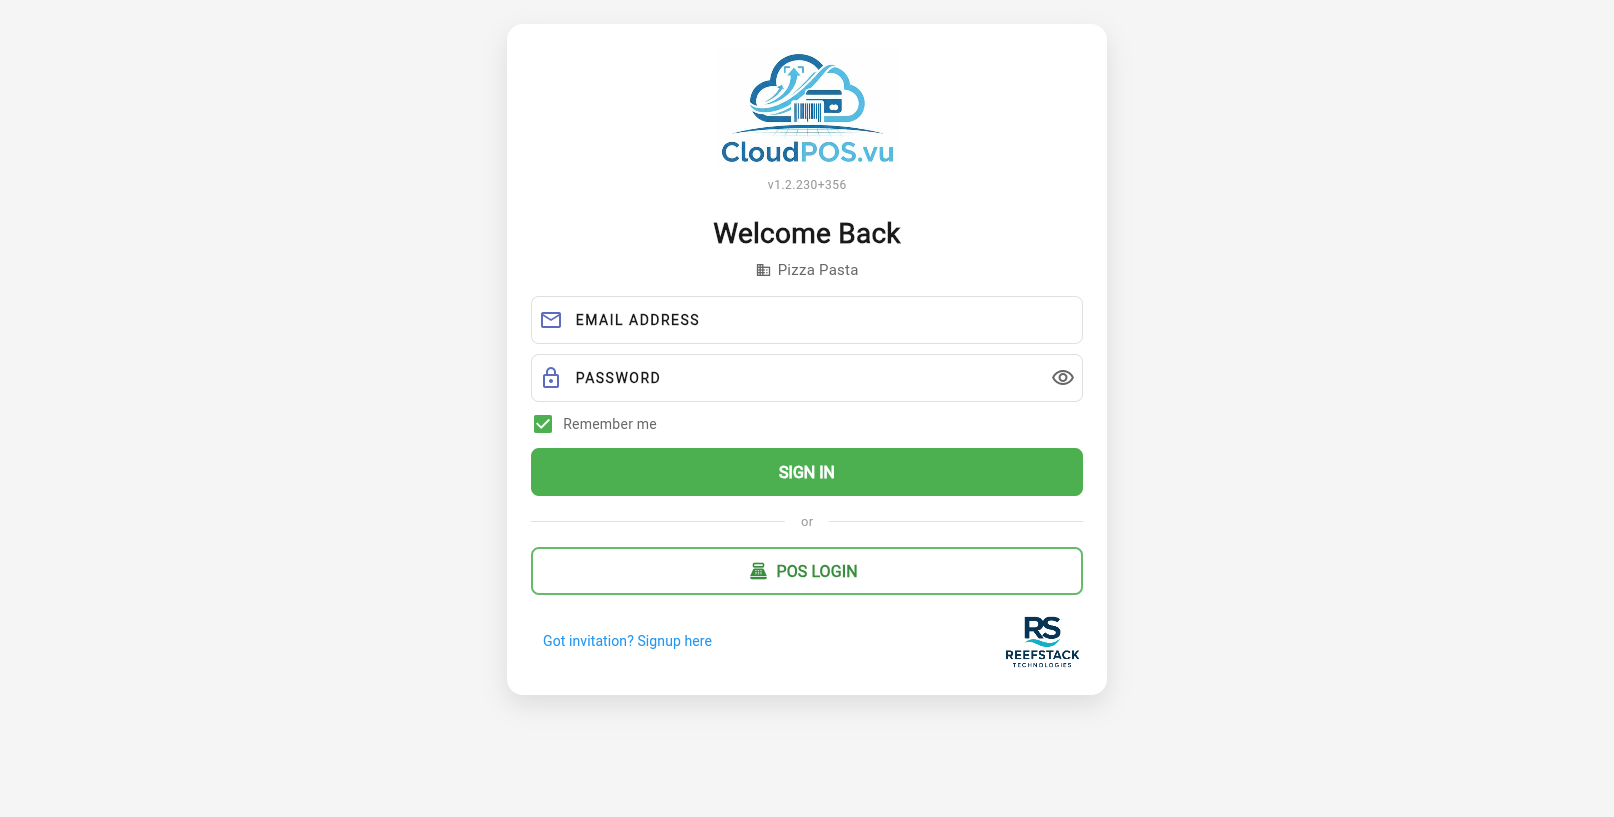
Admin/back-office login. Full access to all modules including POS Management, Settings, Reports.
Cashier quick login using POS ID + PIN. Always visible — handles pairing automatically if device is not yet linked.
First-Time Device Pairing
When POS LOGIN is tapped on an unpaired device, the Pair Device dialog appears:
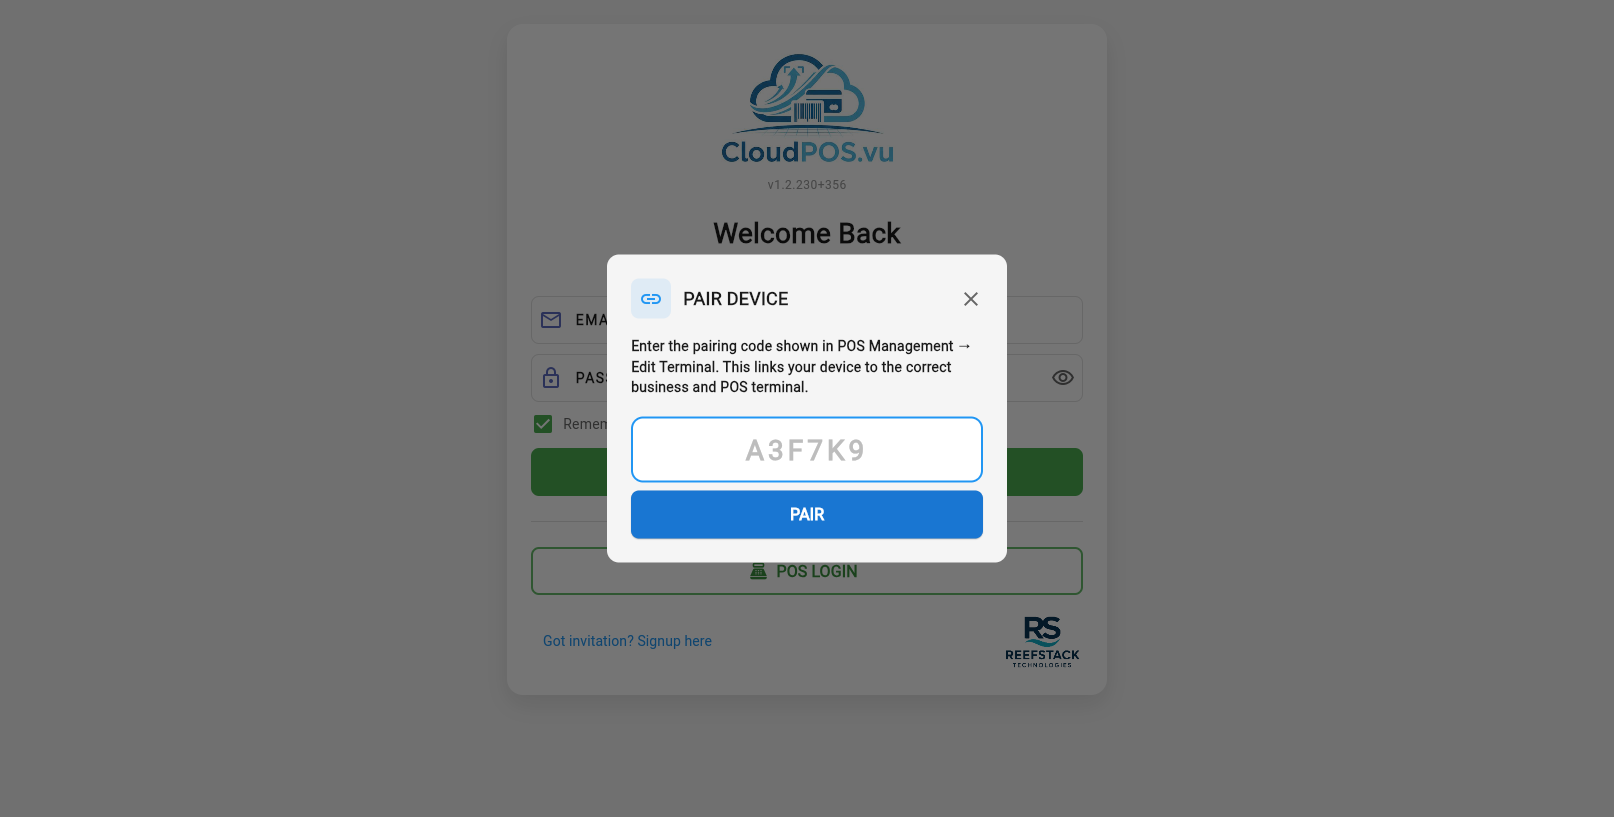
- Get the pairing code from POS Management → Edit Terminal → Device Pairing Code.
- Enter the code on the POS device.
- The code is unique per database — it automatically links the device to the correct business and terminal.
- On success, the device stores the binding and proceeds to the POS Login.
Cashier Login (POS ID + PIN)
After pairing (or if already paired), the POS Login dialog appears:

The cashier enters their POS ID (numeric) and PIN to authenticate. Only staff assigned to this terminal can log in.
When accessing POS from the back office (sidebar → Open POS), you first select a terminal:
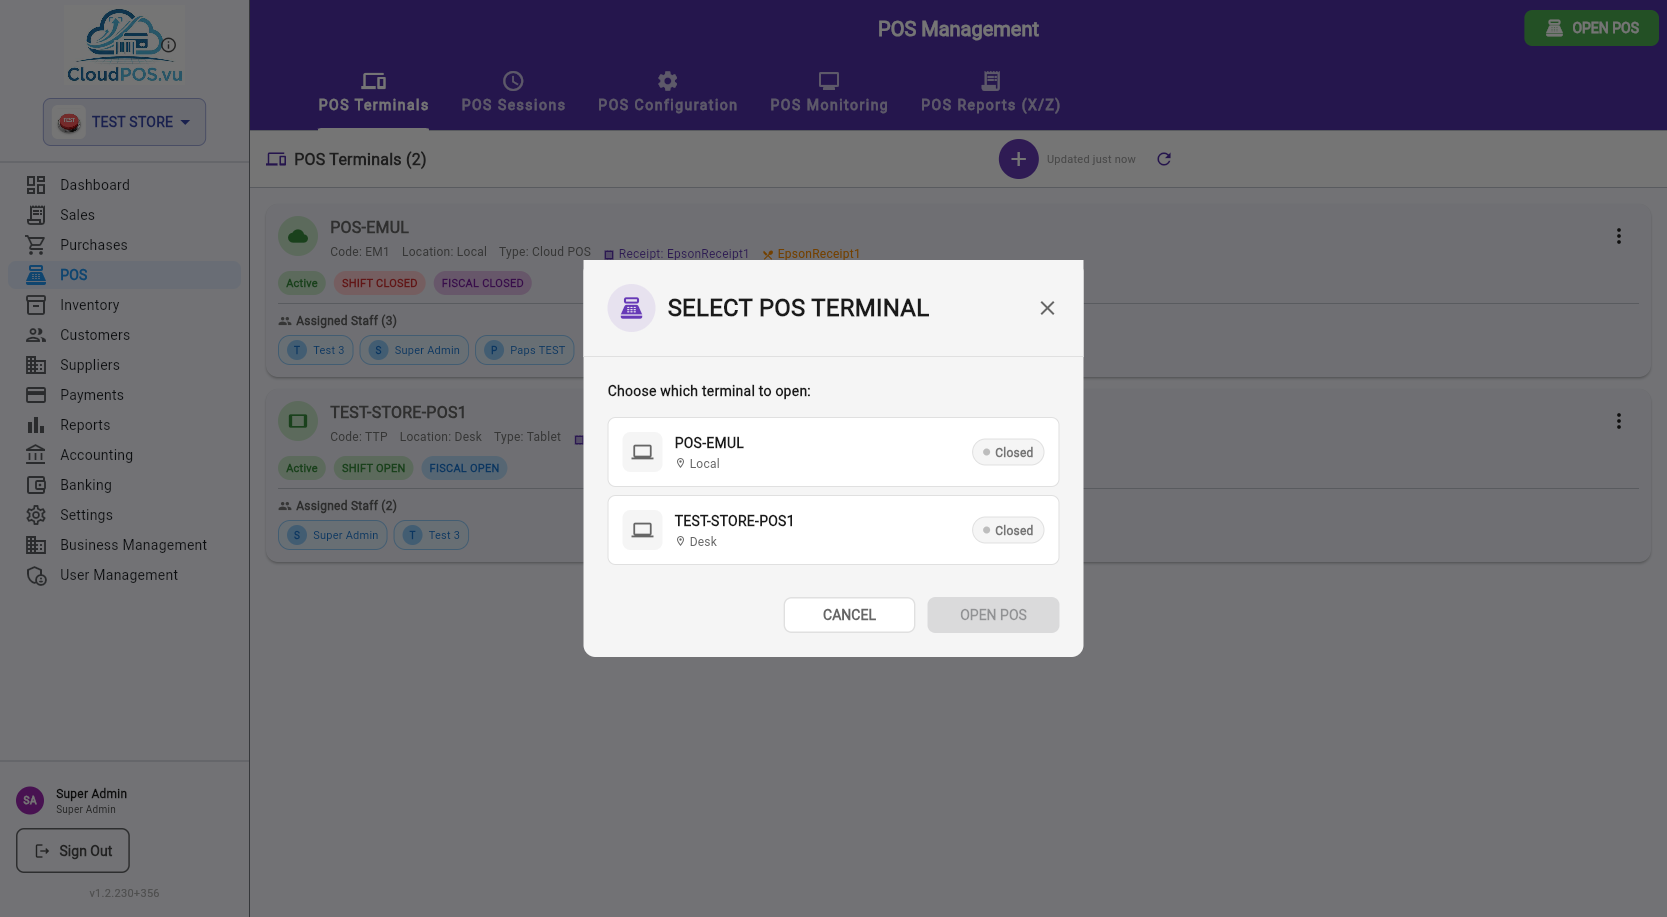
After selecting a terminal, POS authentication is required:
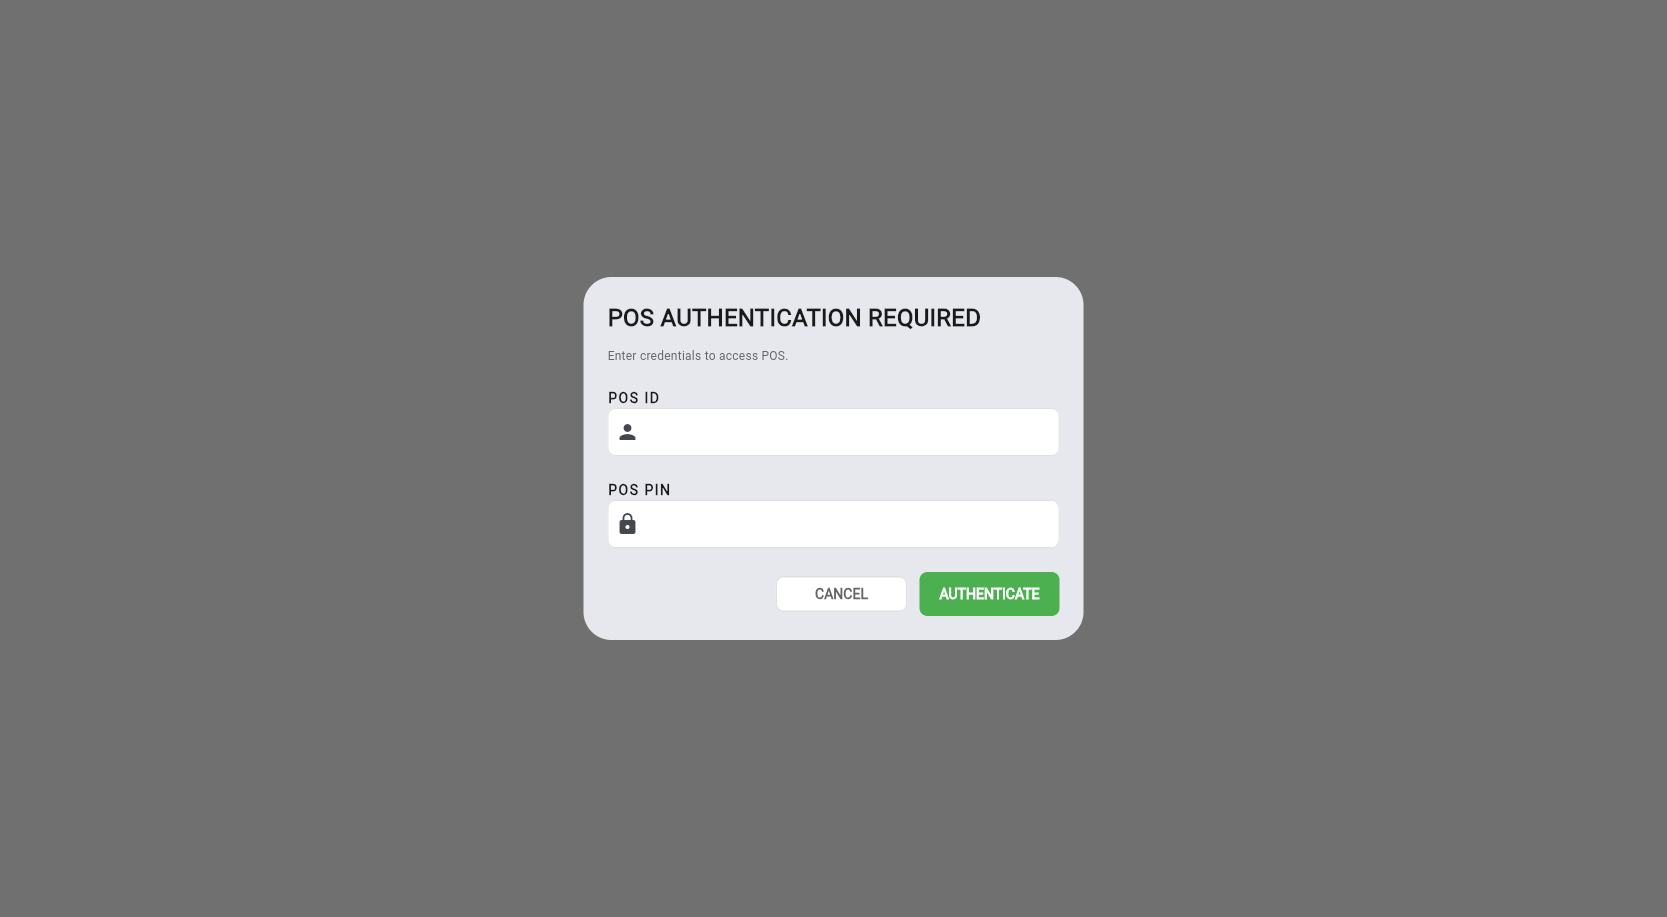
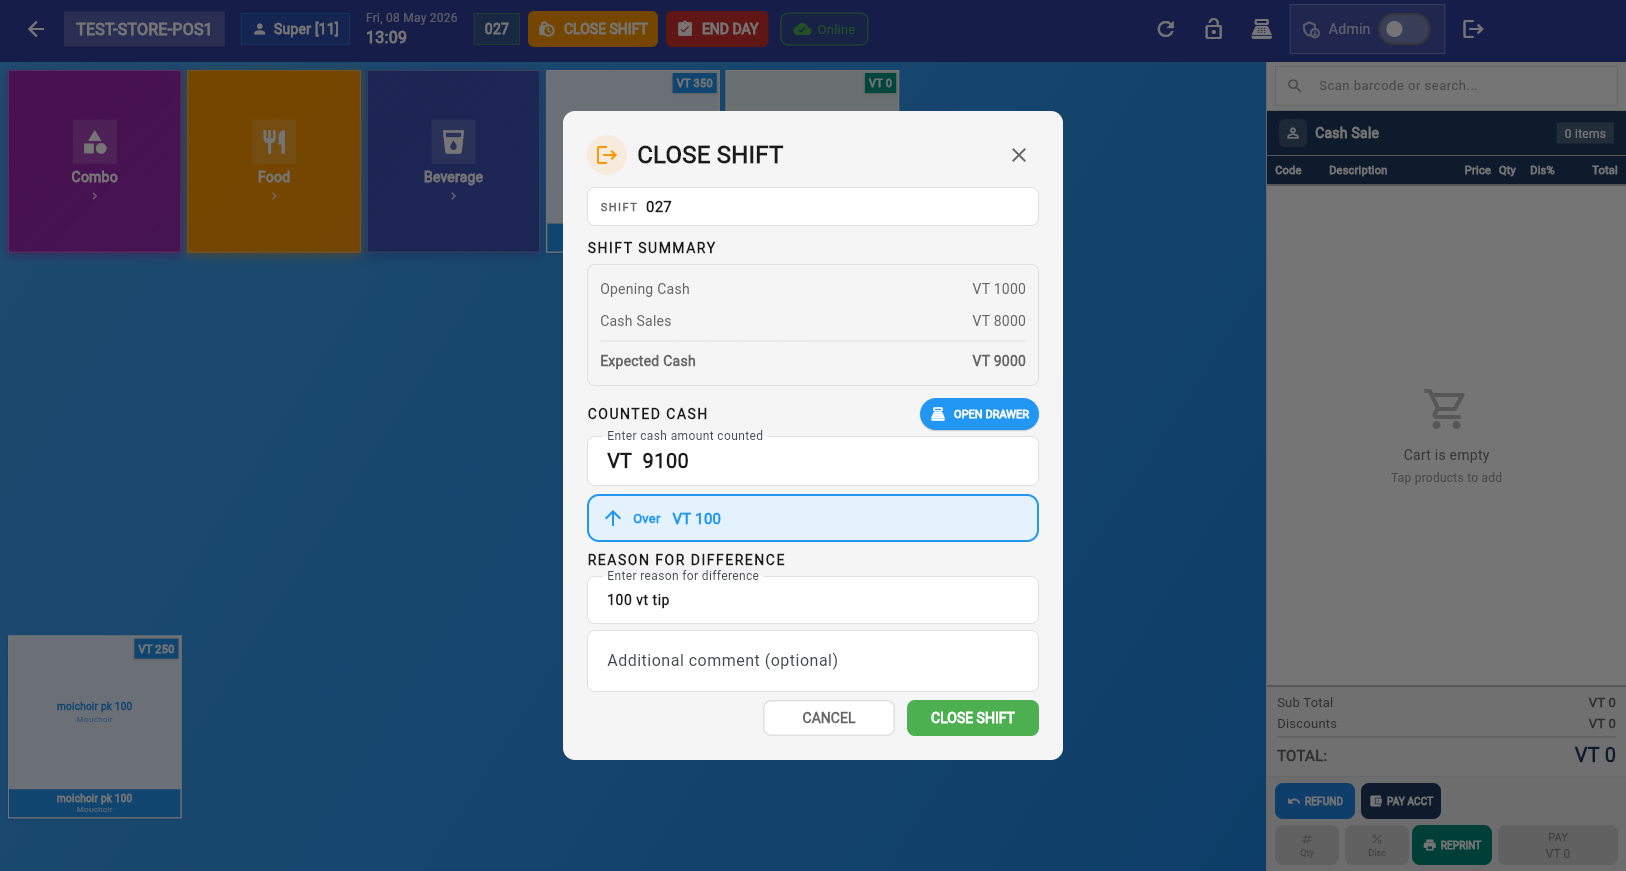
If no shift is open, the Open Shift dialog appears:
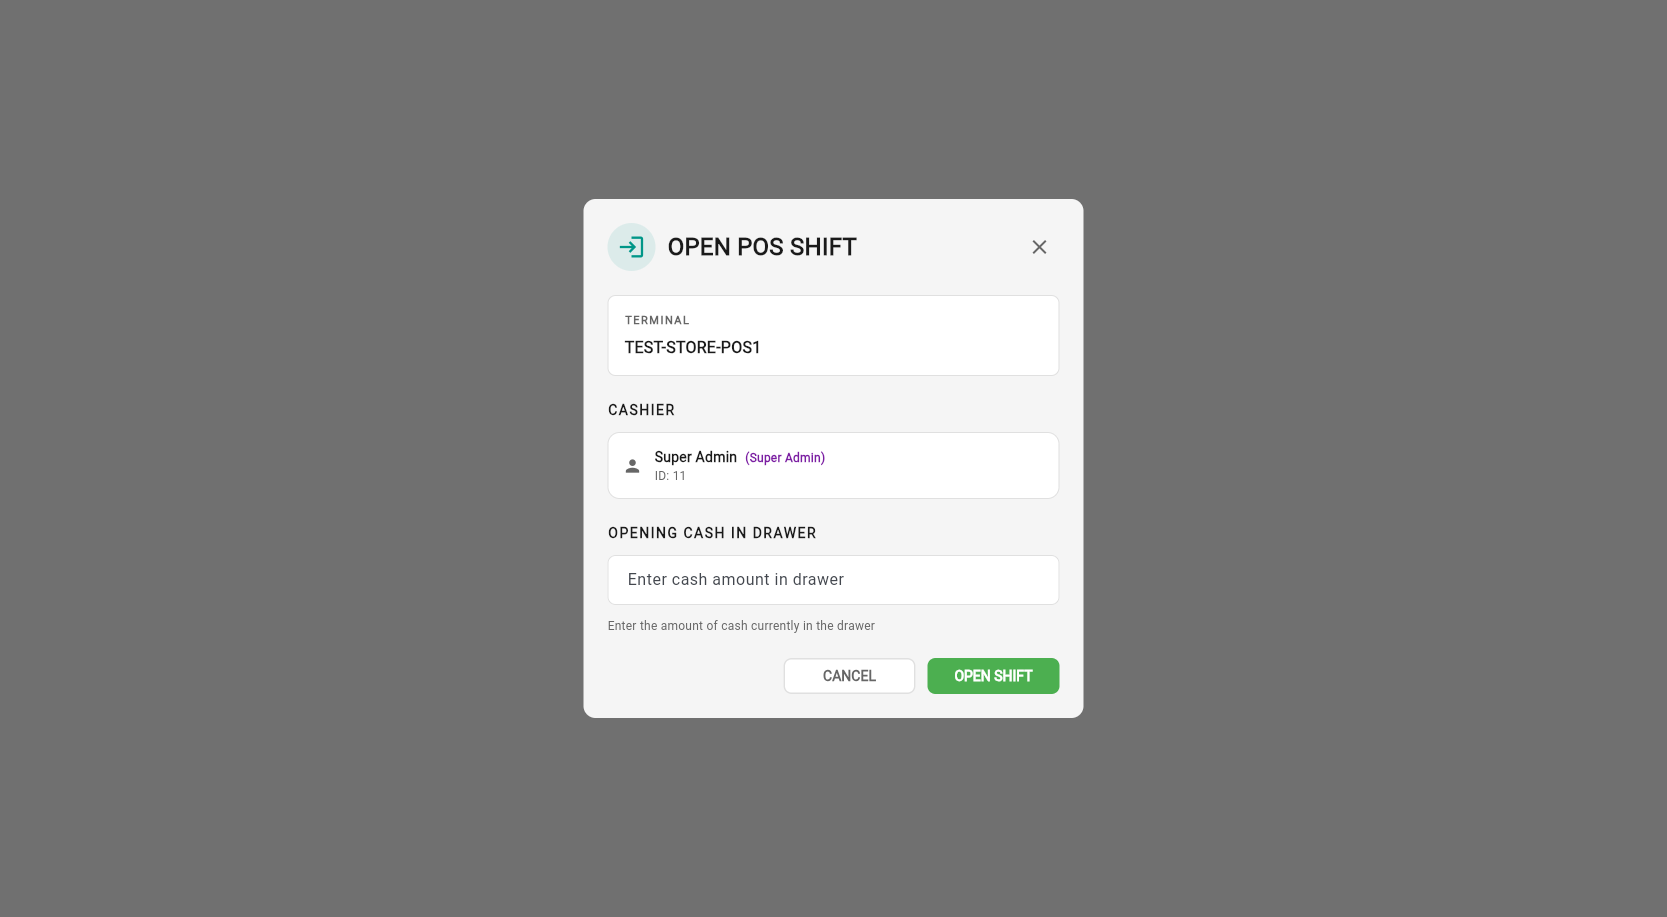
The Opening Cash is the amount of money in the cash drawer at the start of the shift. This is used for cash variance reporting in the Z-Report.
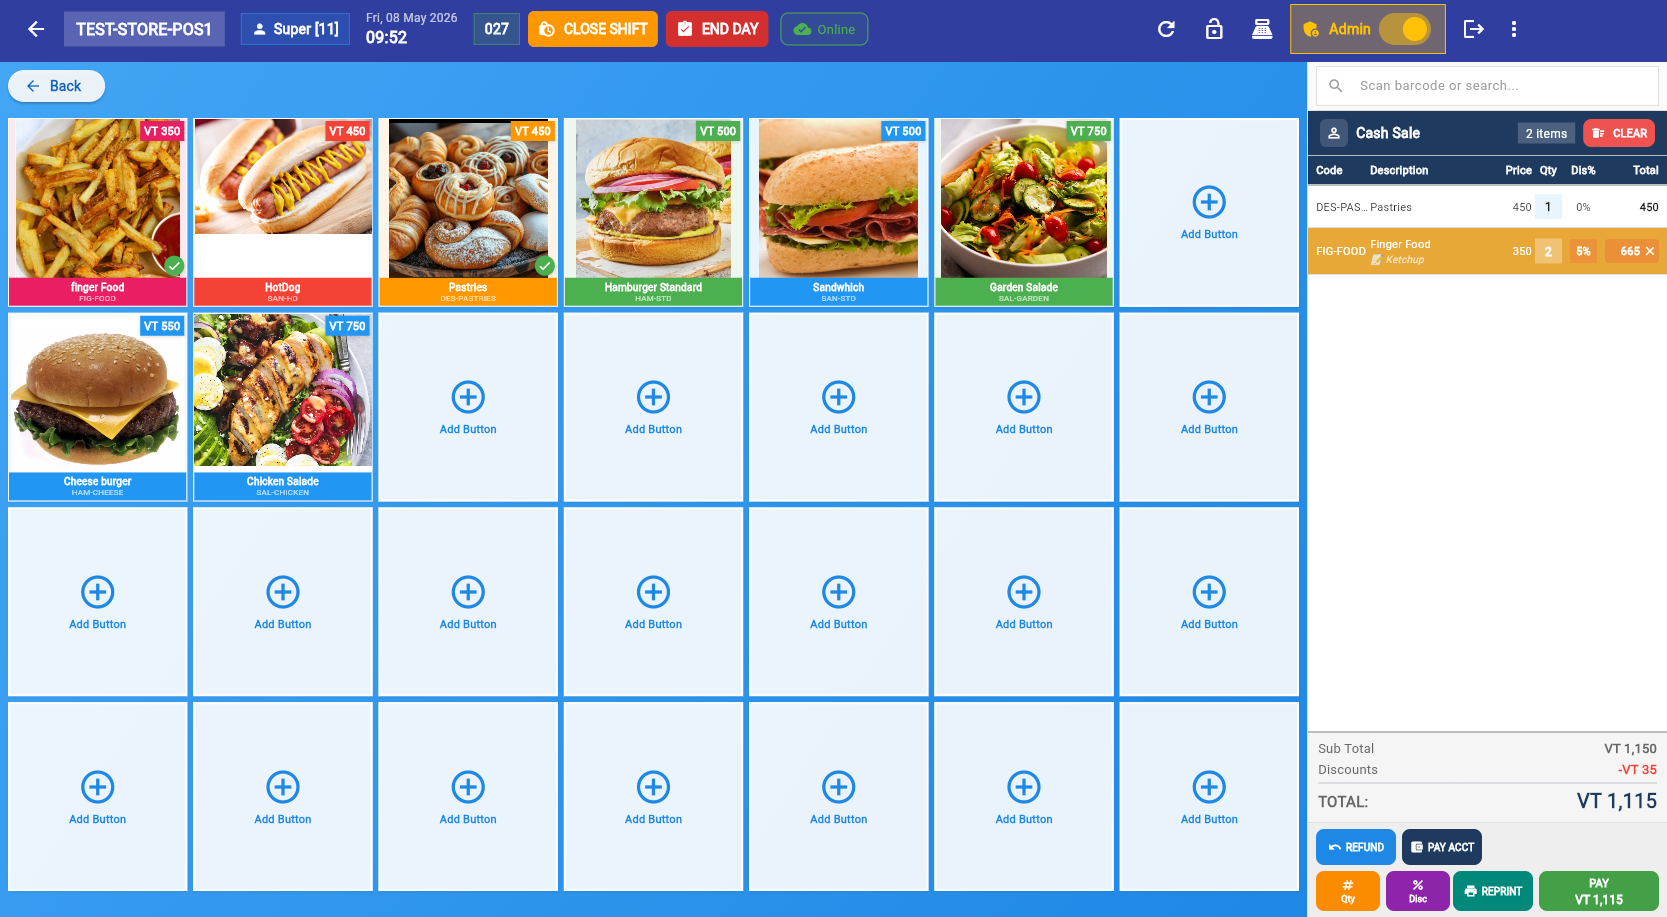
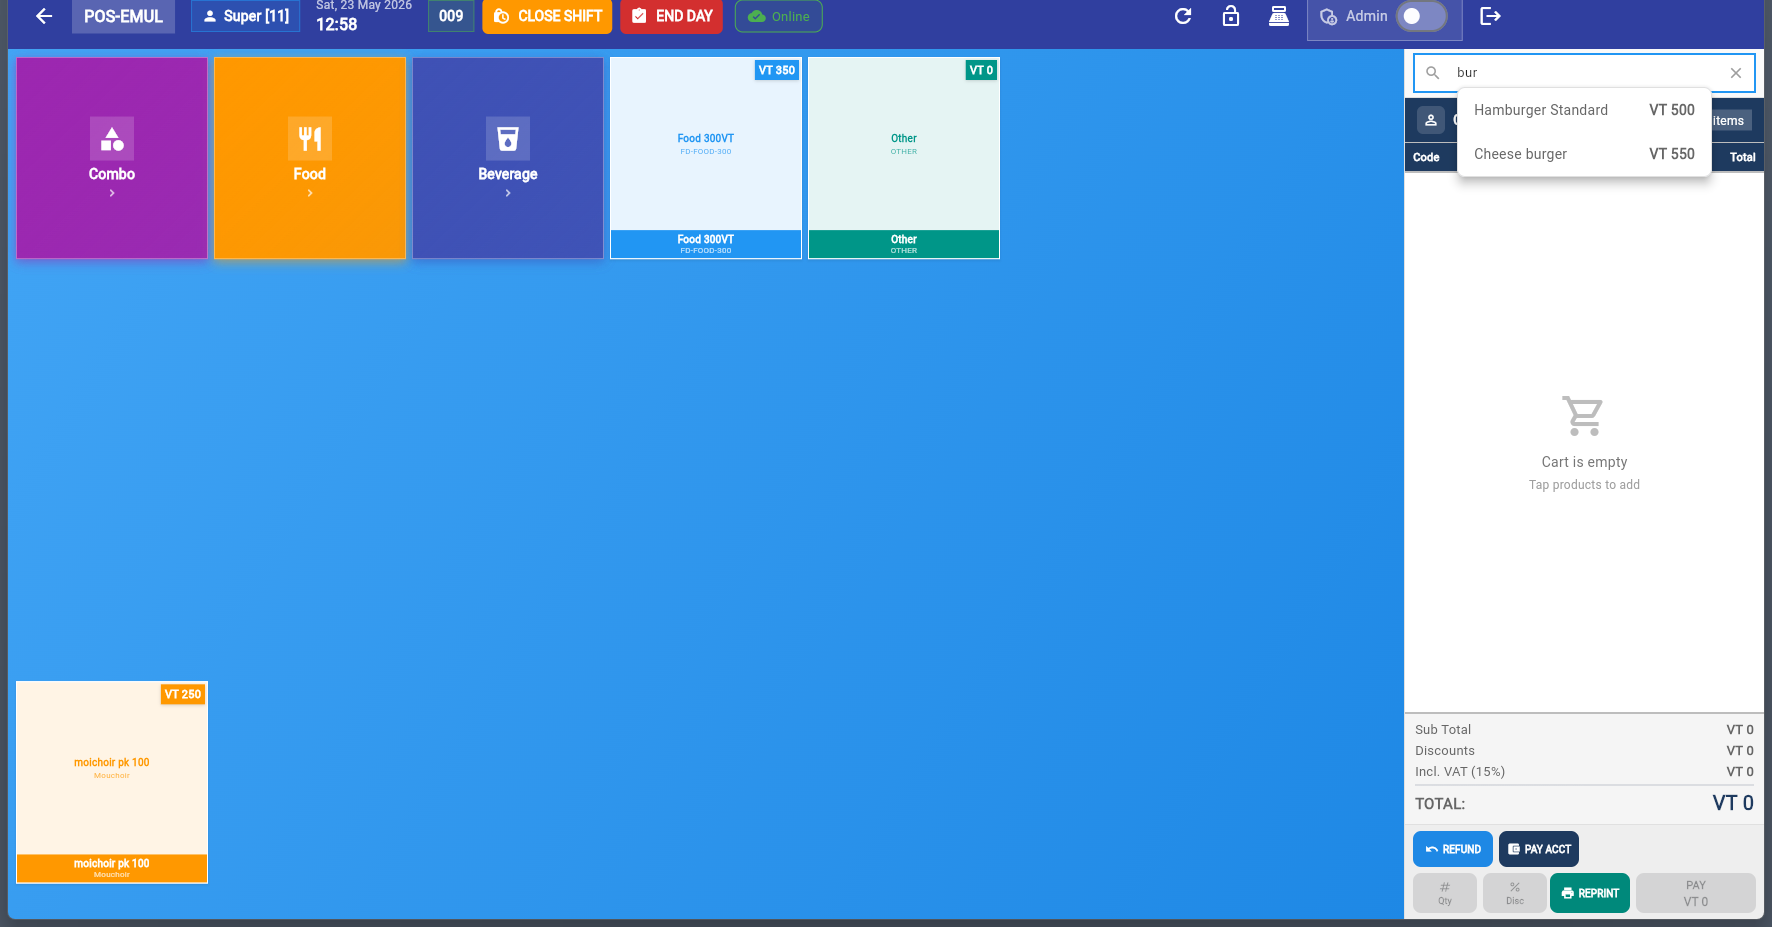
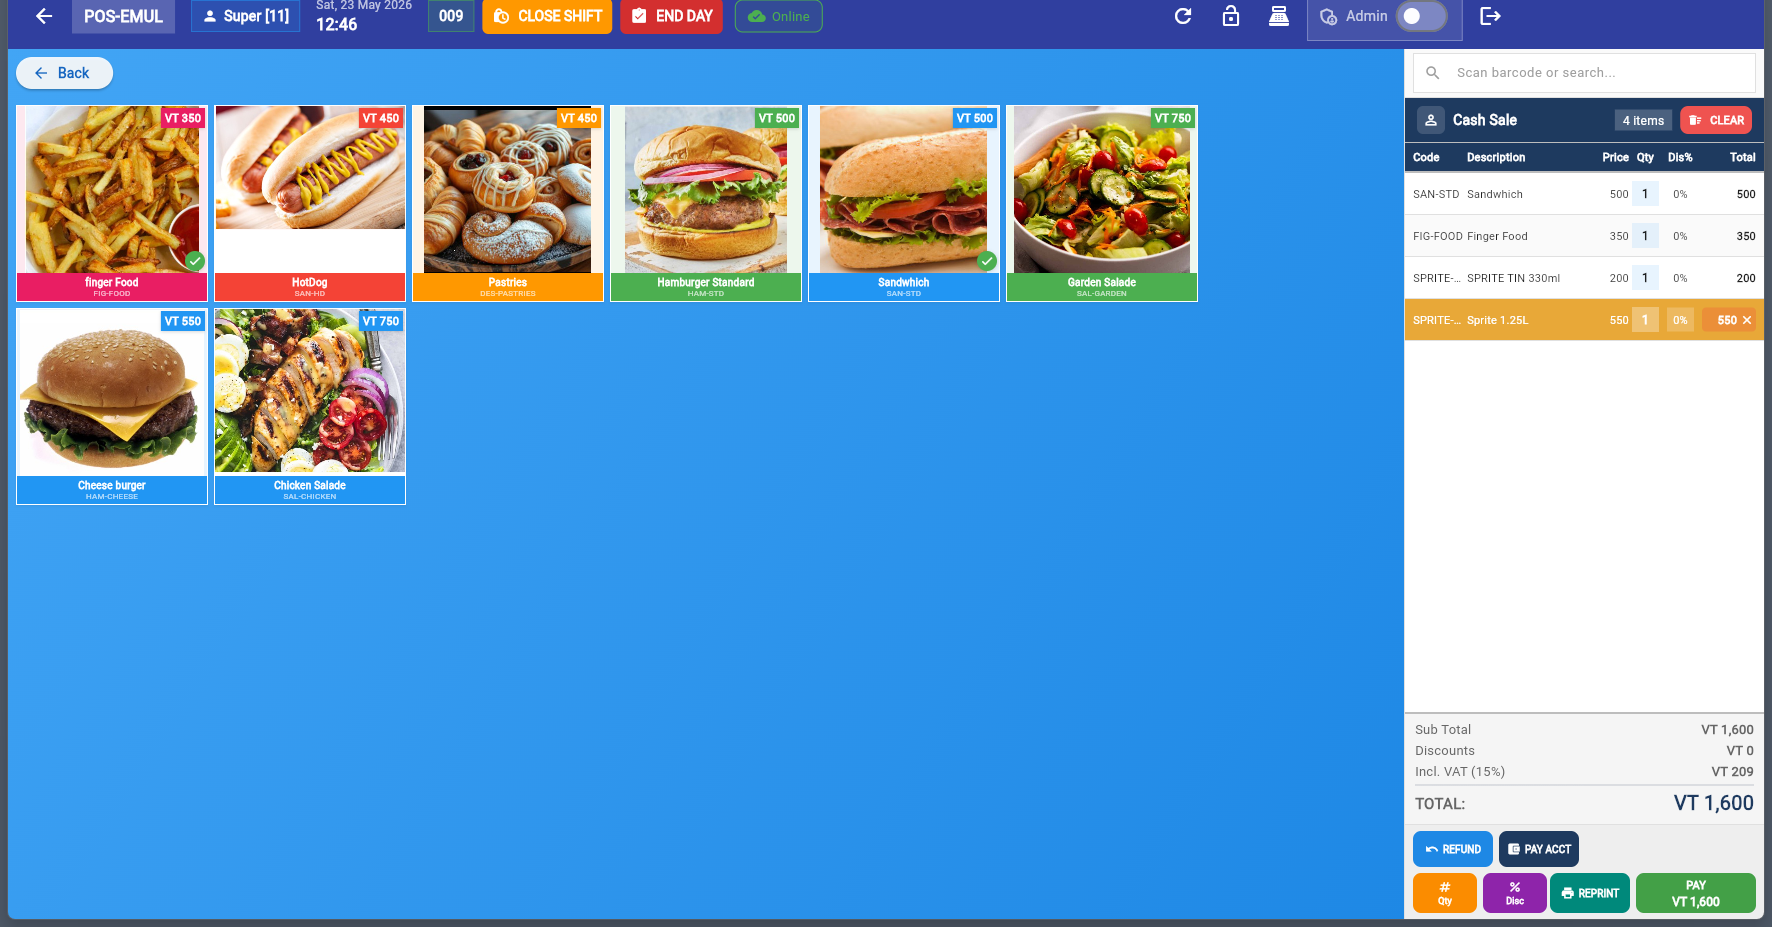
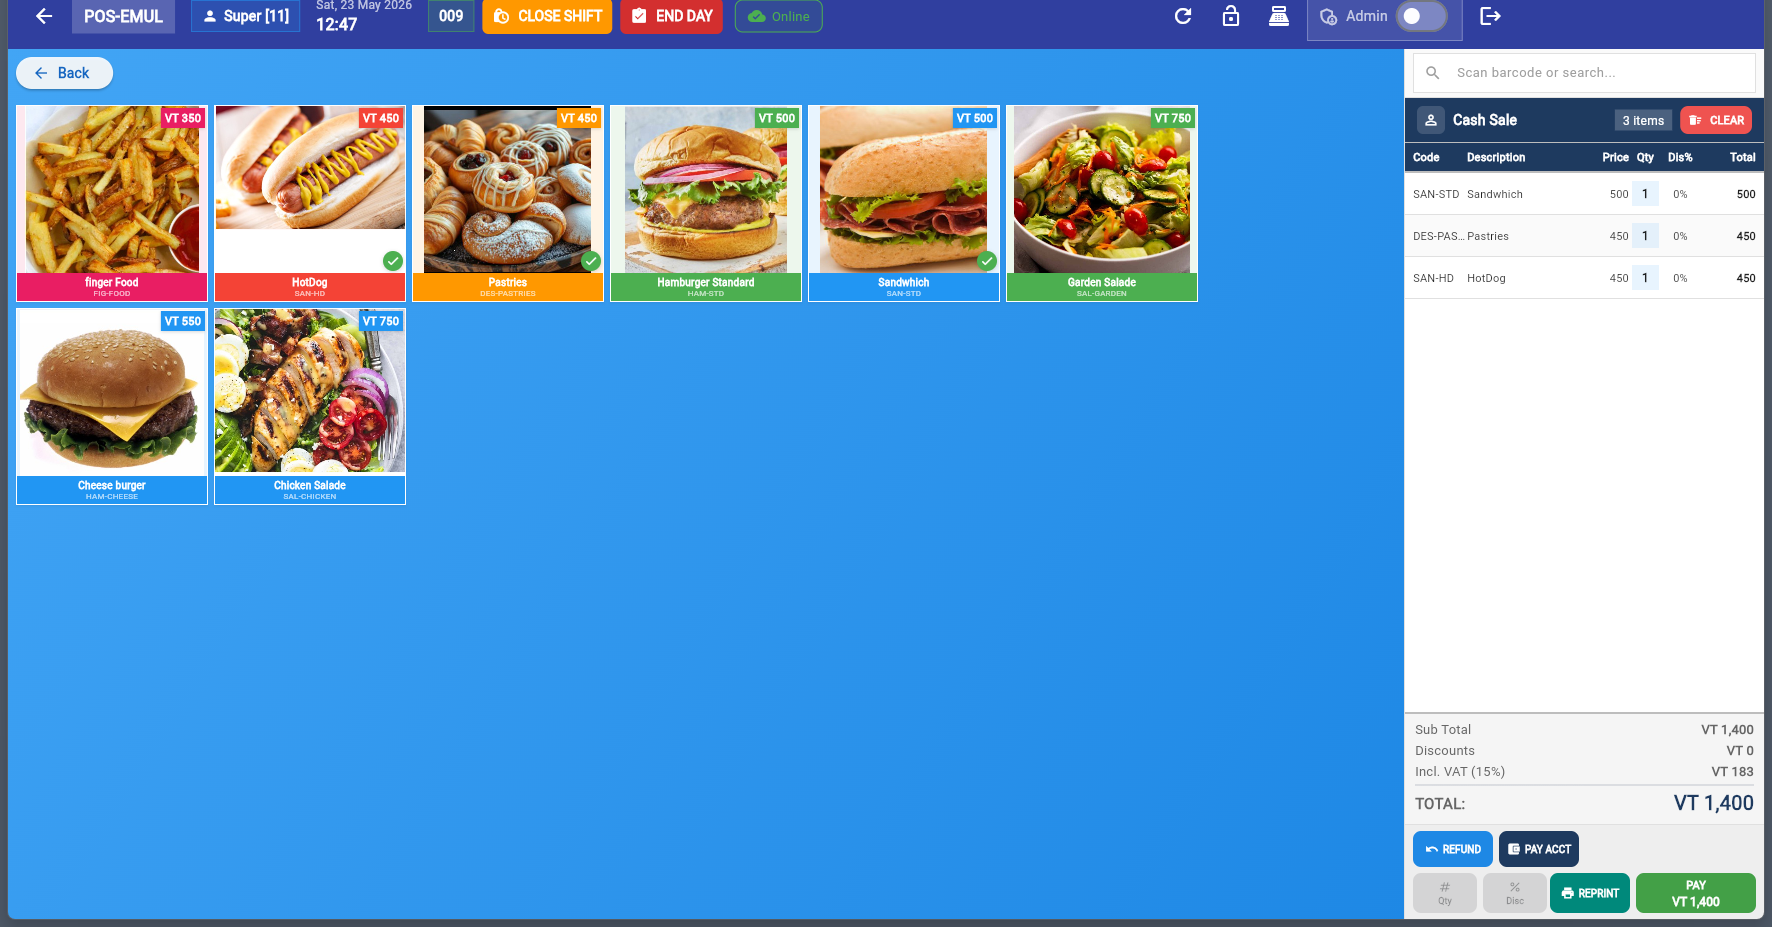
The main POS selling screen is divided into two areas: the product grid (left) and the cart panel (right):
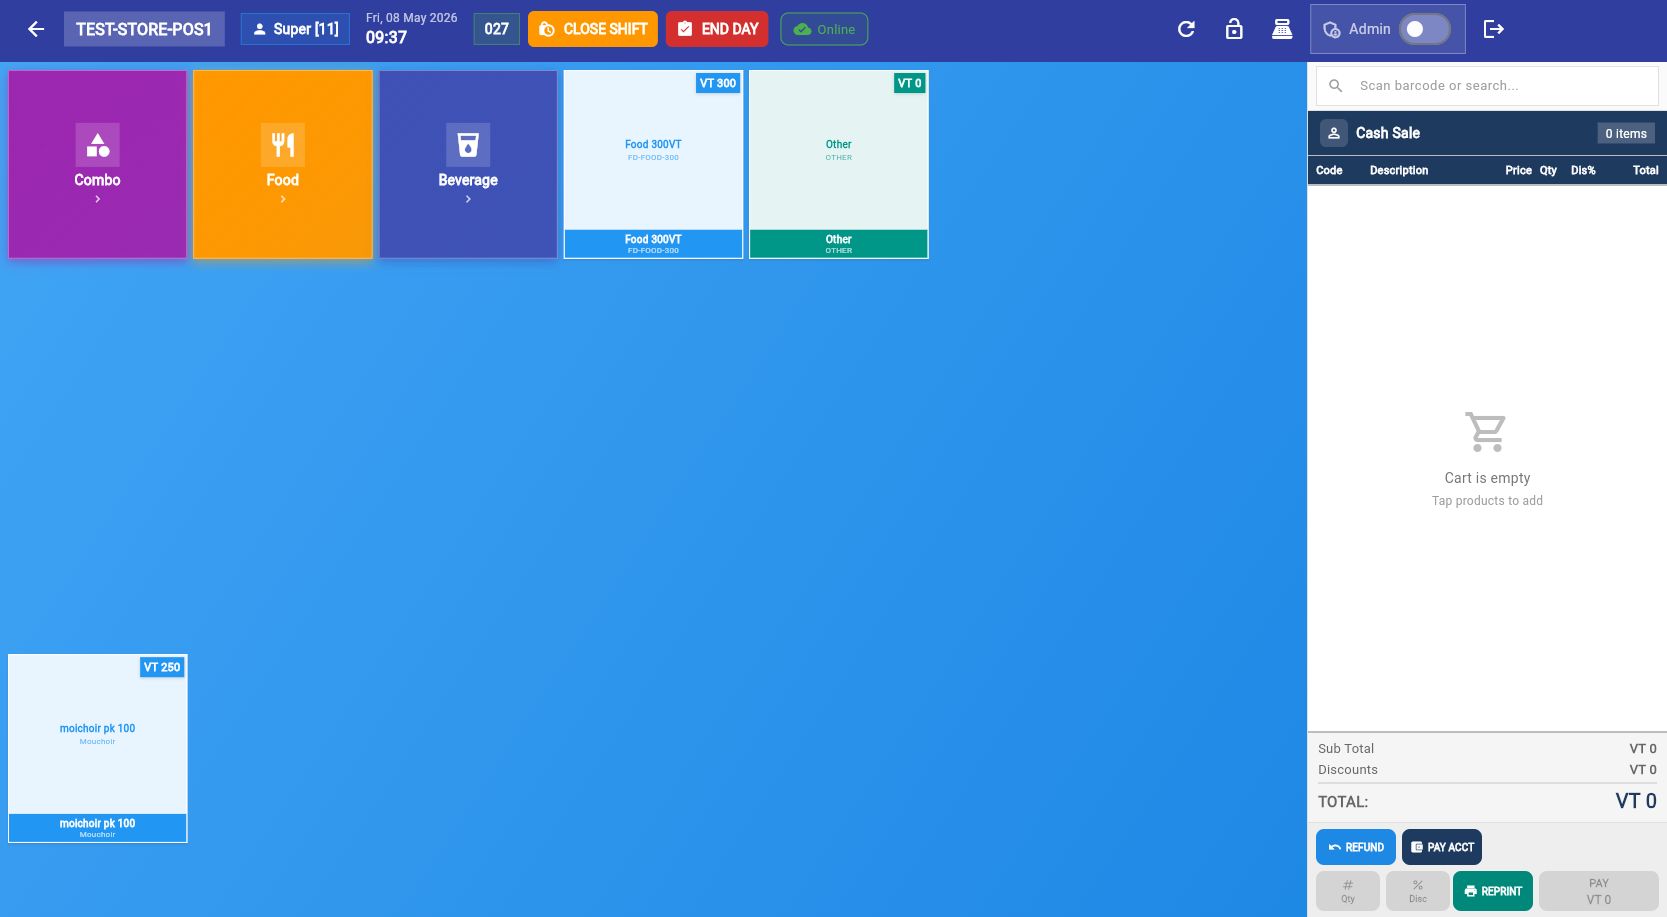
Adding Products
Tap a product button on the grid to add it to the cart. The cart updates in real time with quantity, price, and tax. You can also find products by searching by name or by scanning a barcode (GTIN) with a USB or Bluetooth barcode scanner.
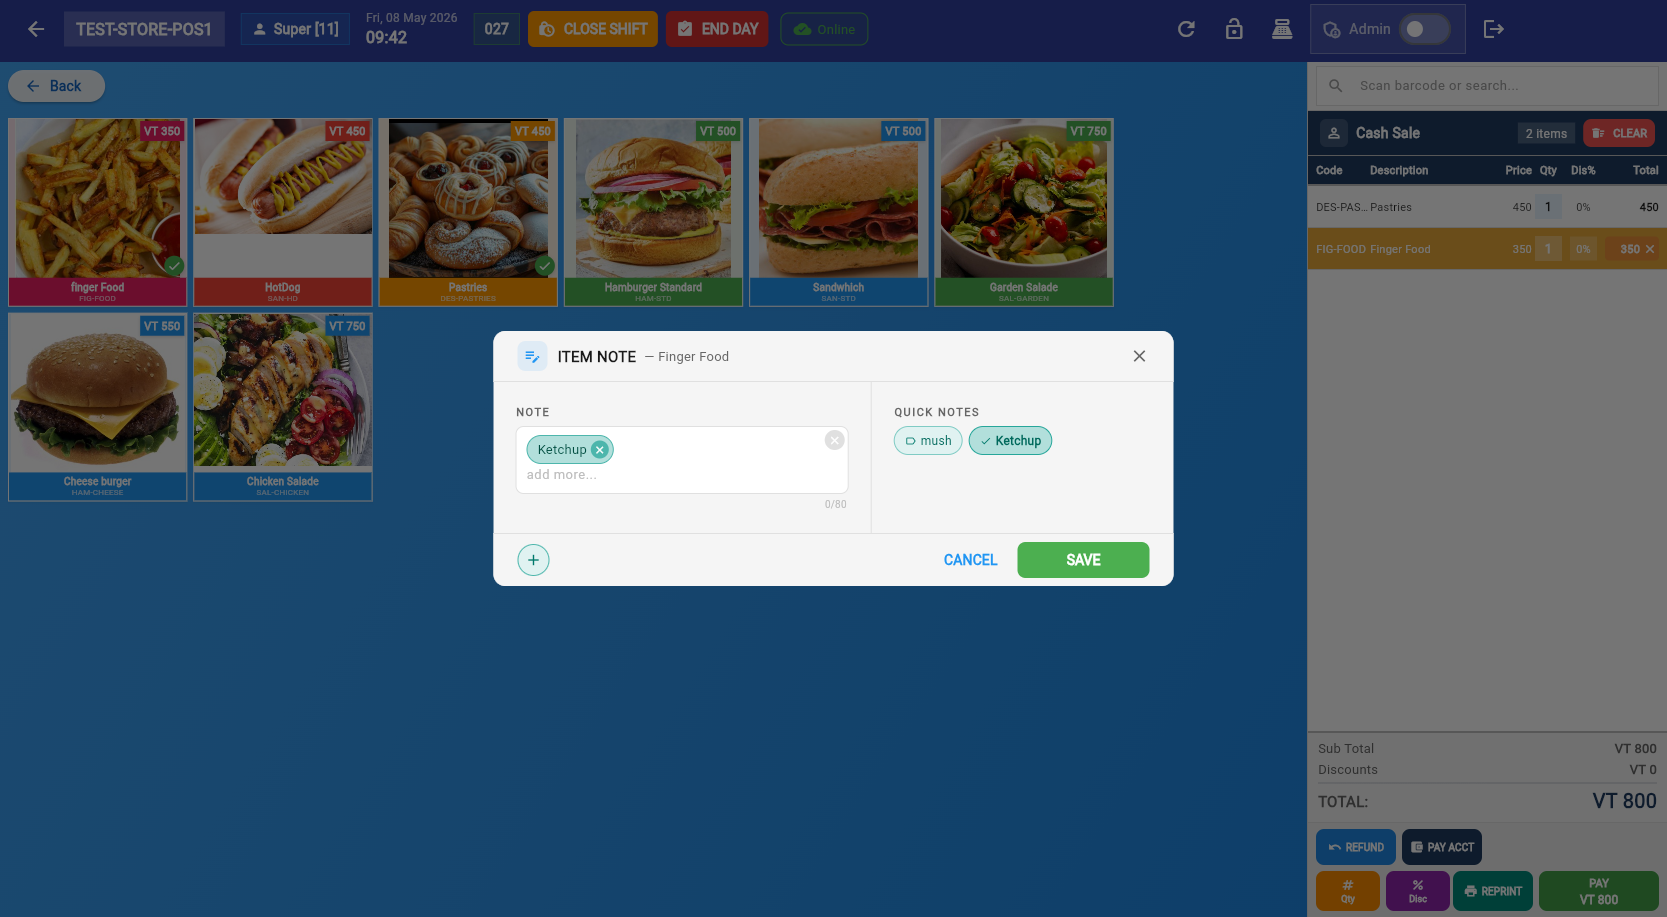
Item Notes
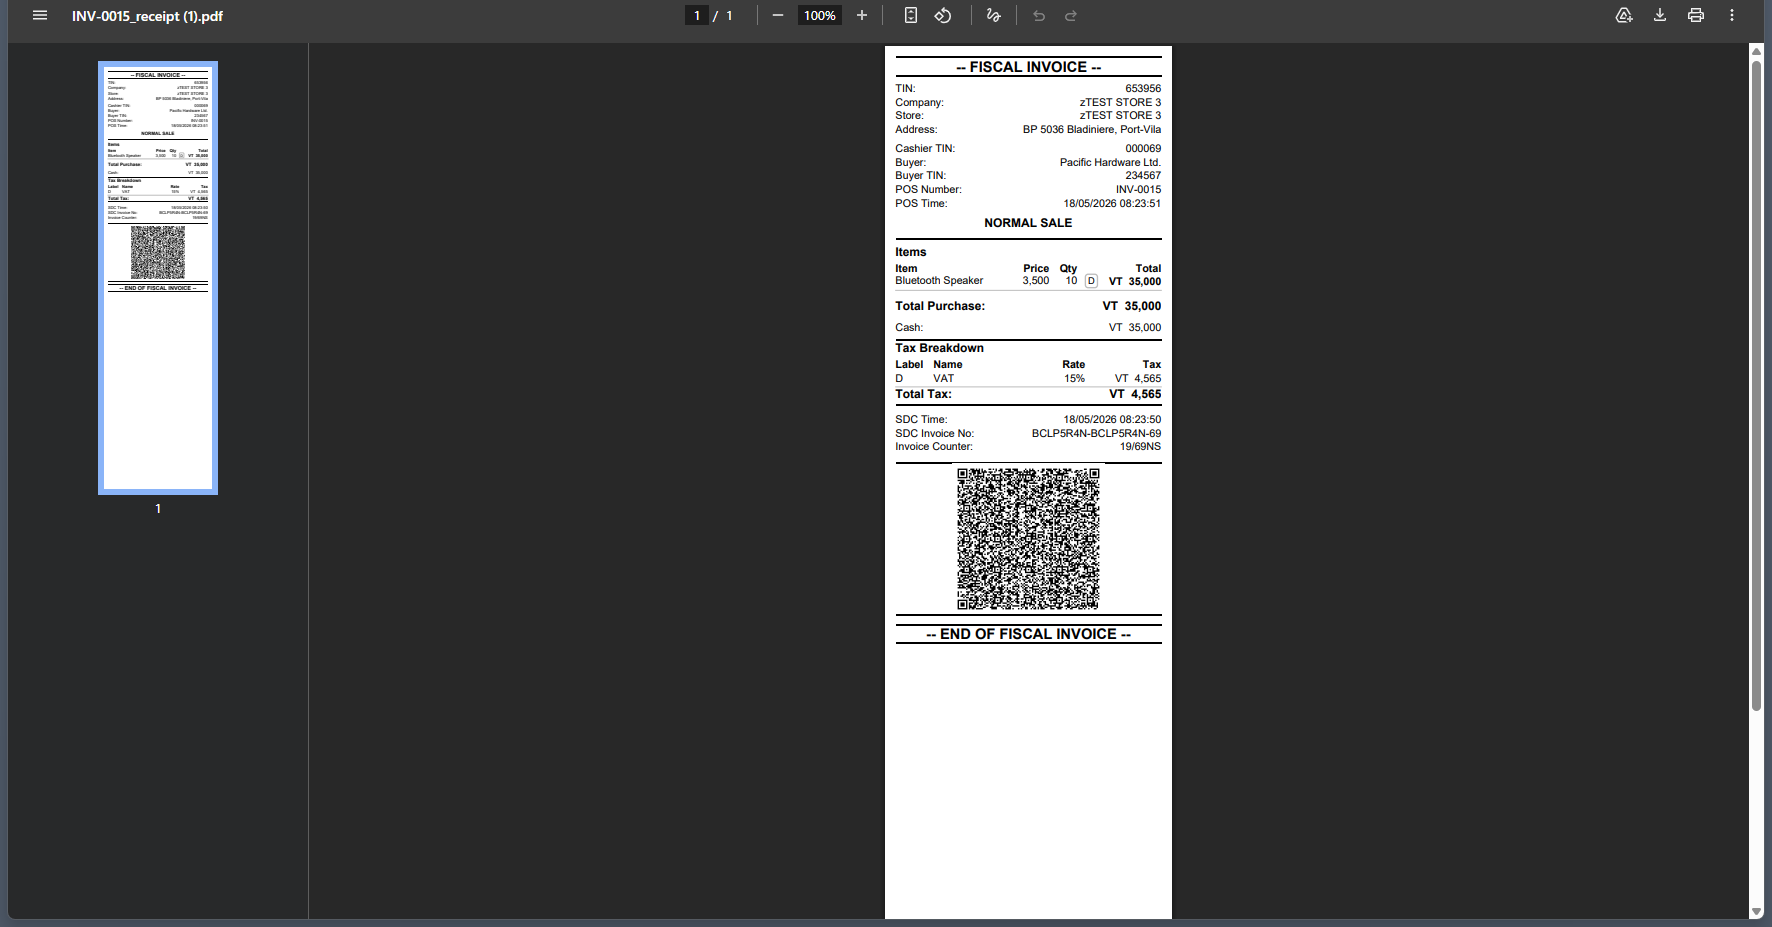
Double-click on a cart item to add an item note. Notes are printed on:
- The customer receipt
- The kitchen/order ticket (if the product is set to print to an order printer)
Remove Item from Cart (Void Function)
Tap the ✕ button on any cart item to instantly remove it before issuing the fiscal invoice. This is the Void Function — individual items can be removed without cancelling the entire sale.
Change Quantity
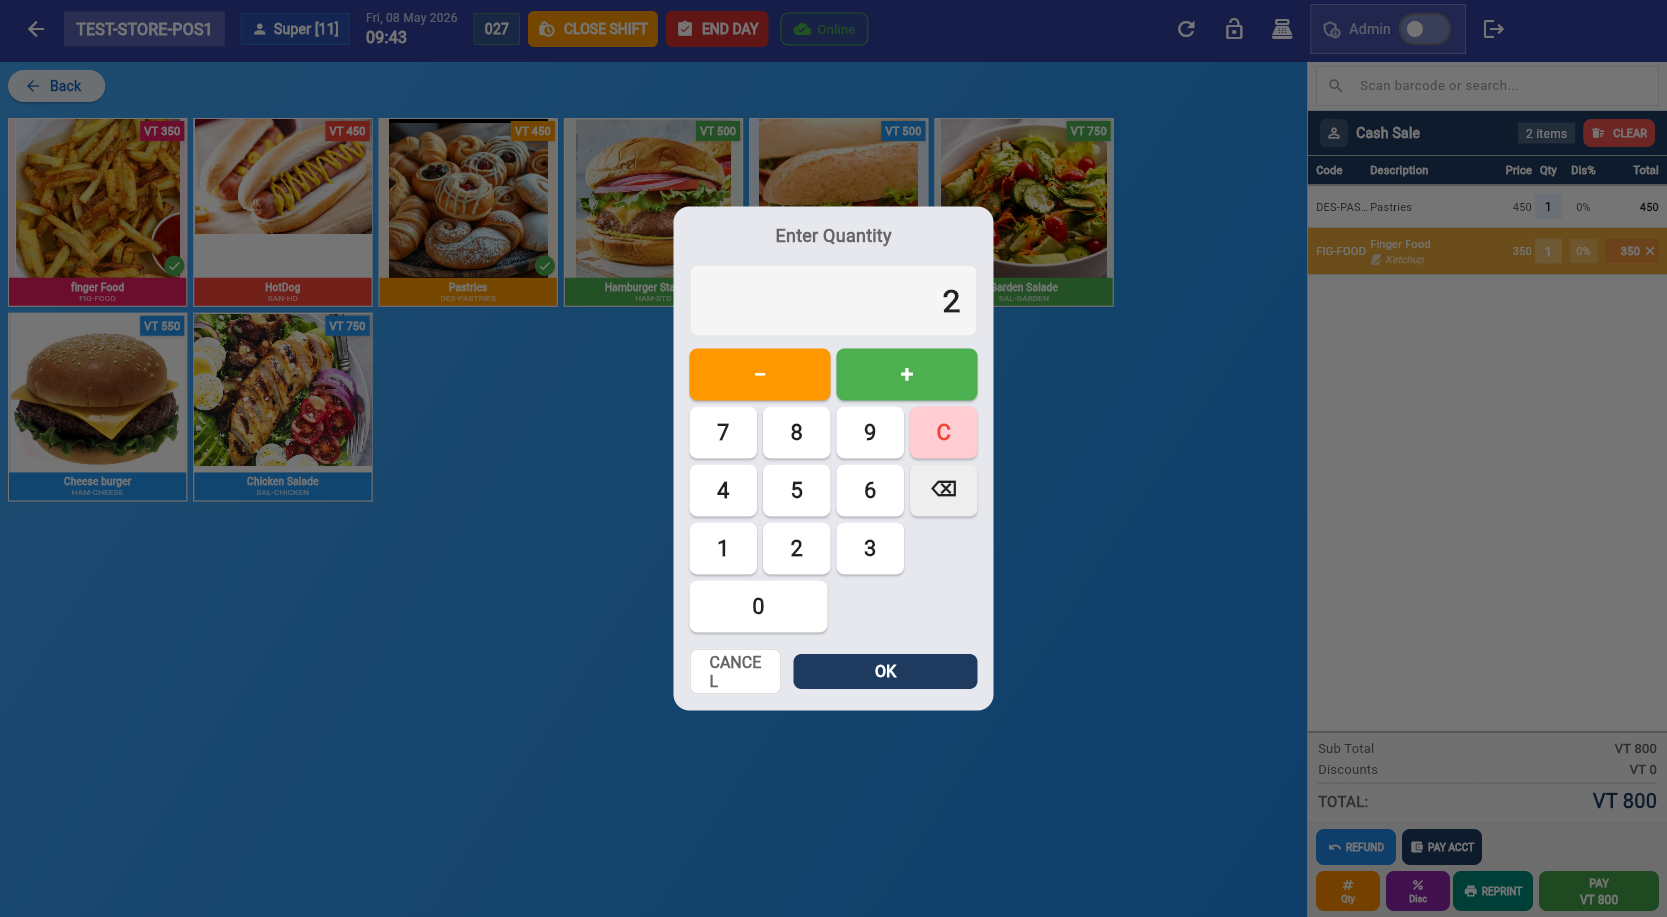
Tap the qty button on a cart item to open the quantity dialog. Use the numpad to set the exact quantity.
Apply Discount
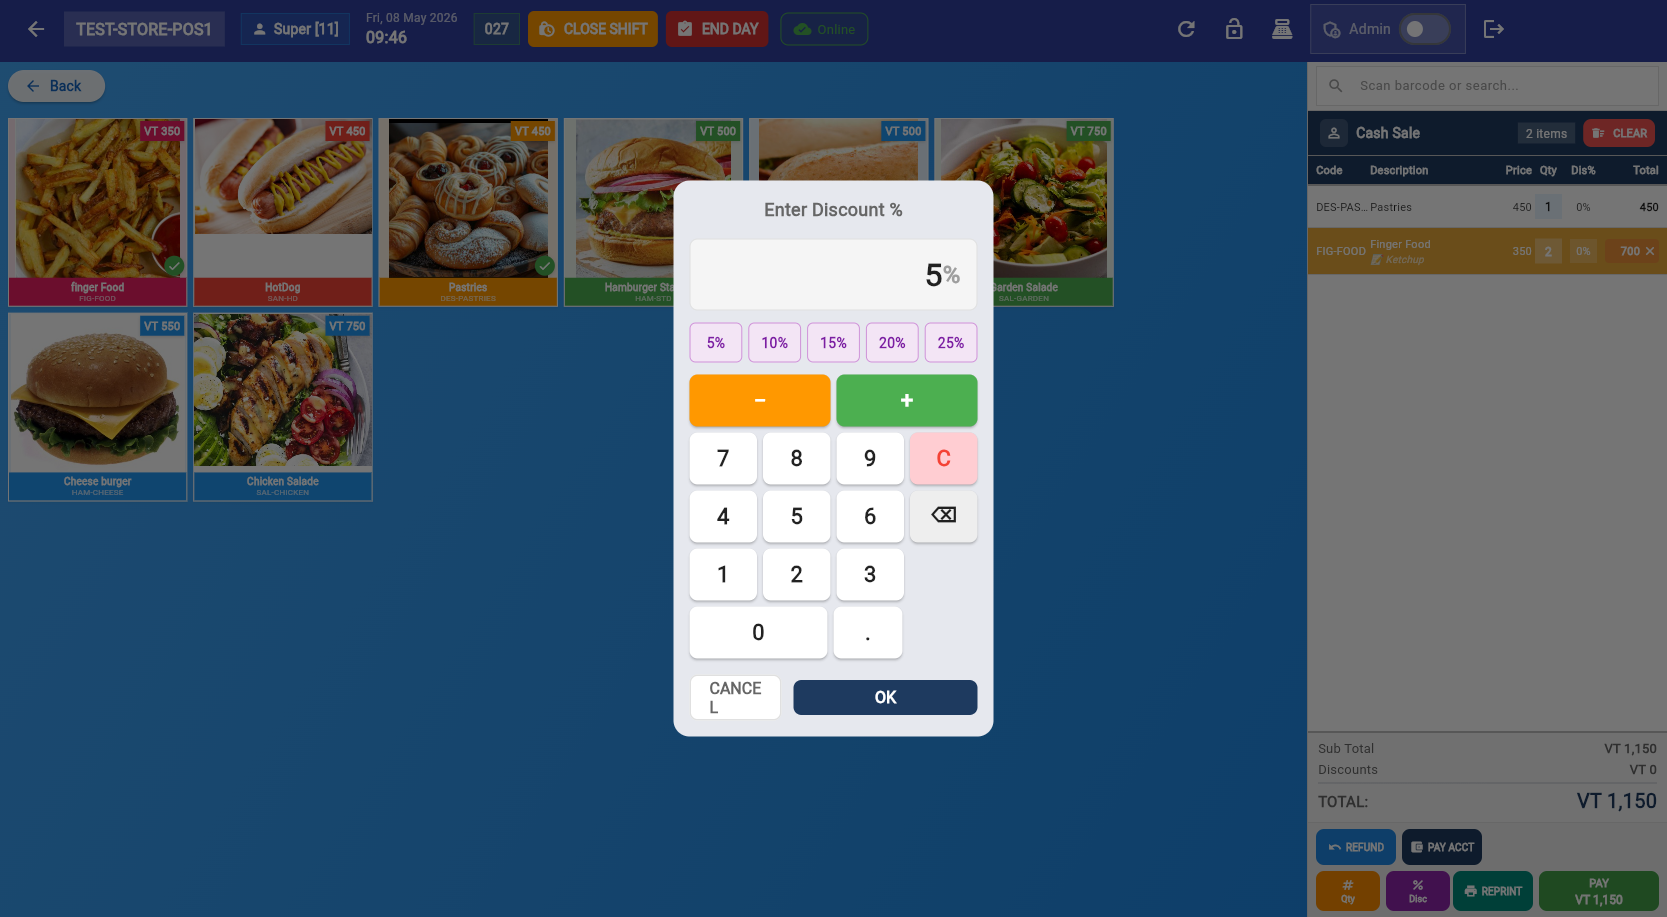
Apply a discount percentage to an individual cart item. The discount is reflected in the line total immediately.
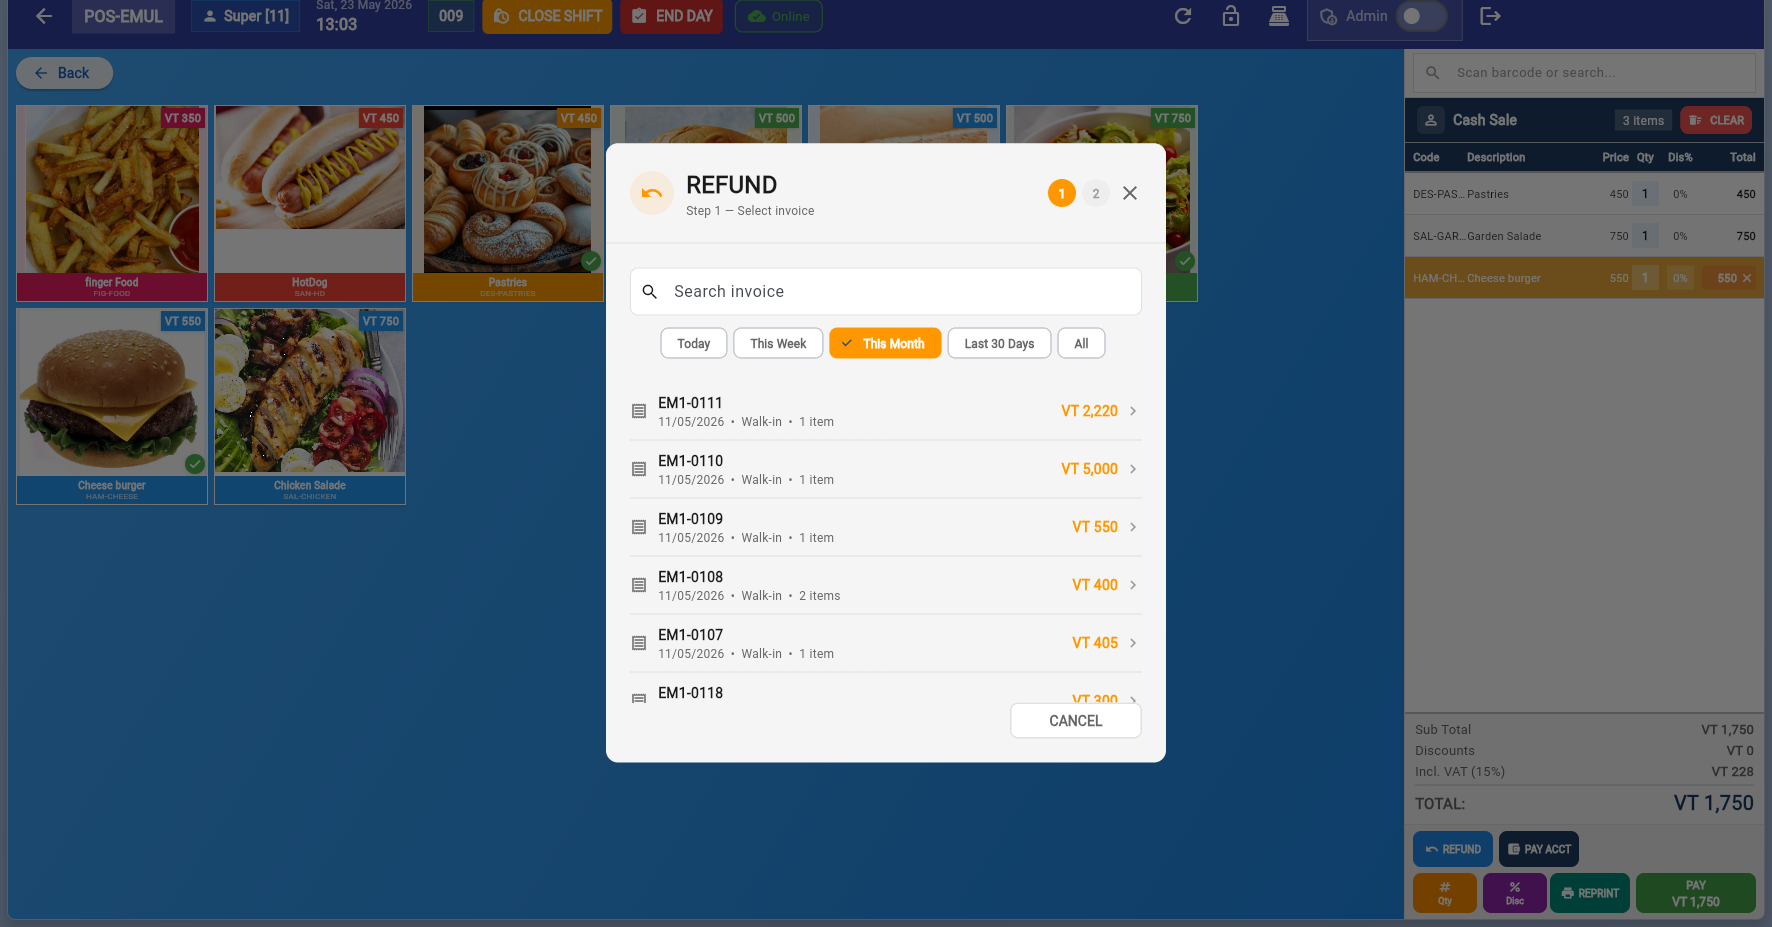
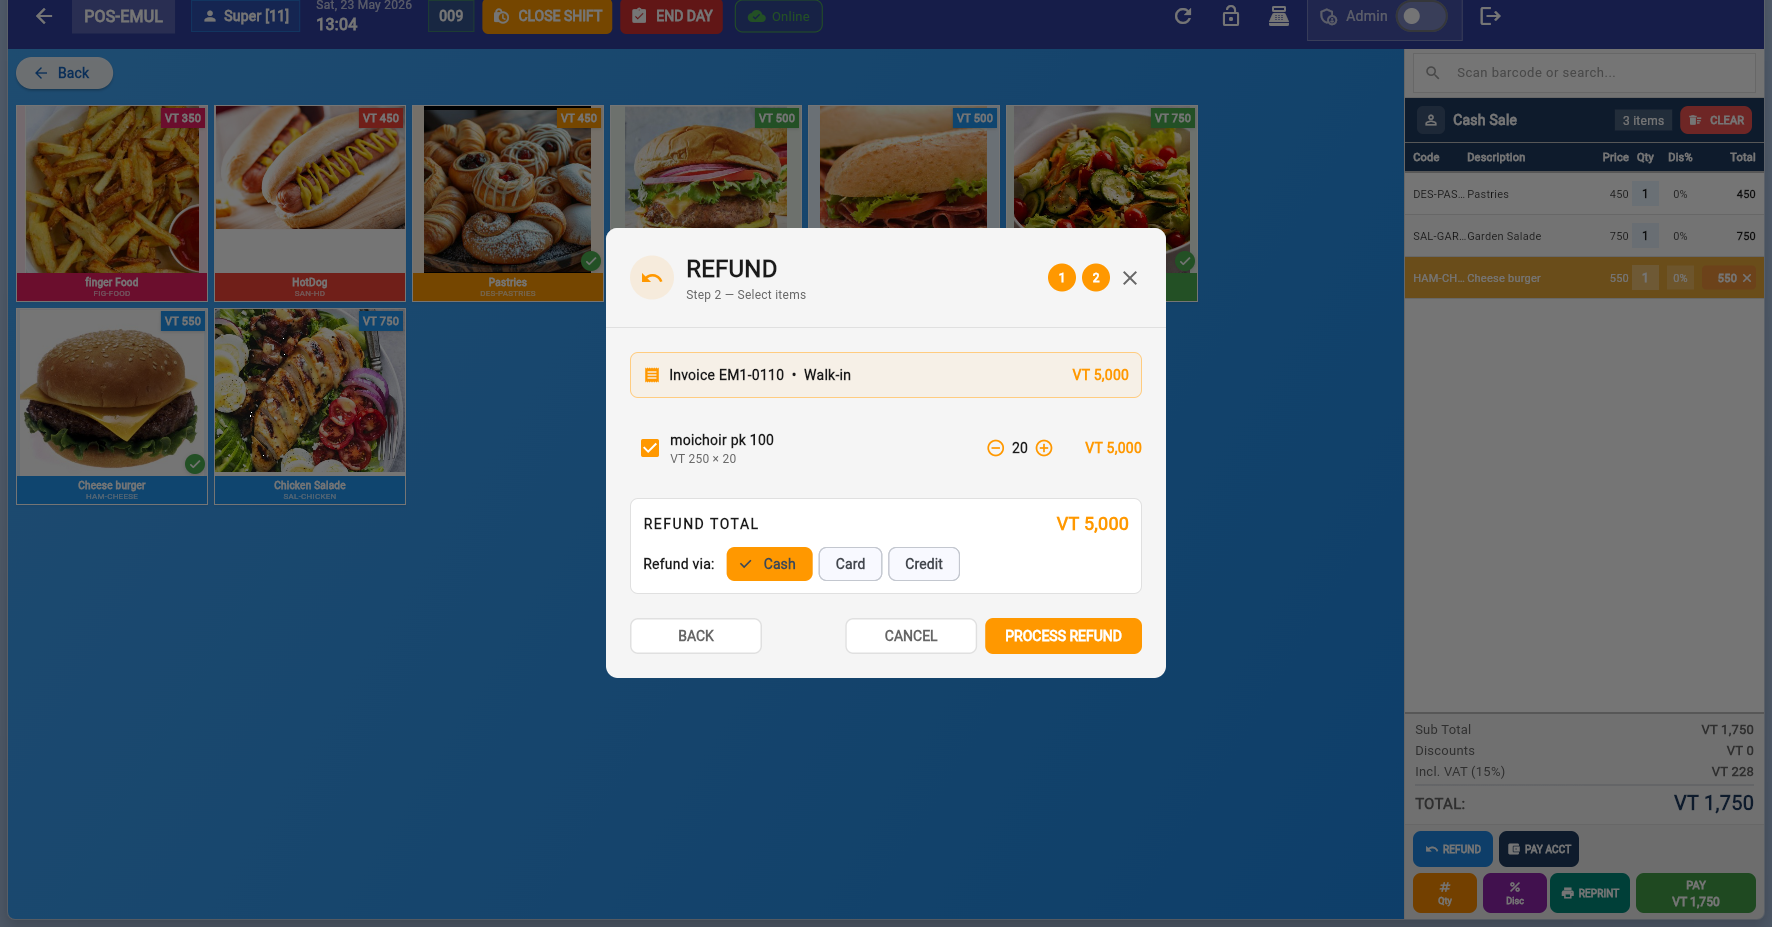
Tap Pay to open the payment dialog:

Payment Features
Optionally link the sale to a customer. Search by name or create a new customer on the fly.
Cash, Card, Bank Transfer, Cheque, Mobile Payment — configured in Settings → Payments.
Combine multiple payment methods for one sale. Add amounts until balance reaches zero.
Cancel the sale. Records it as a voided invoice (status: "voided", amount: 0) with all original products visible — used to track staff cancellations.
Split Payment
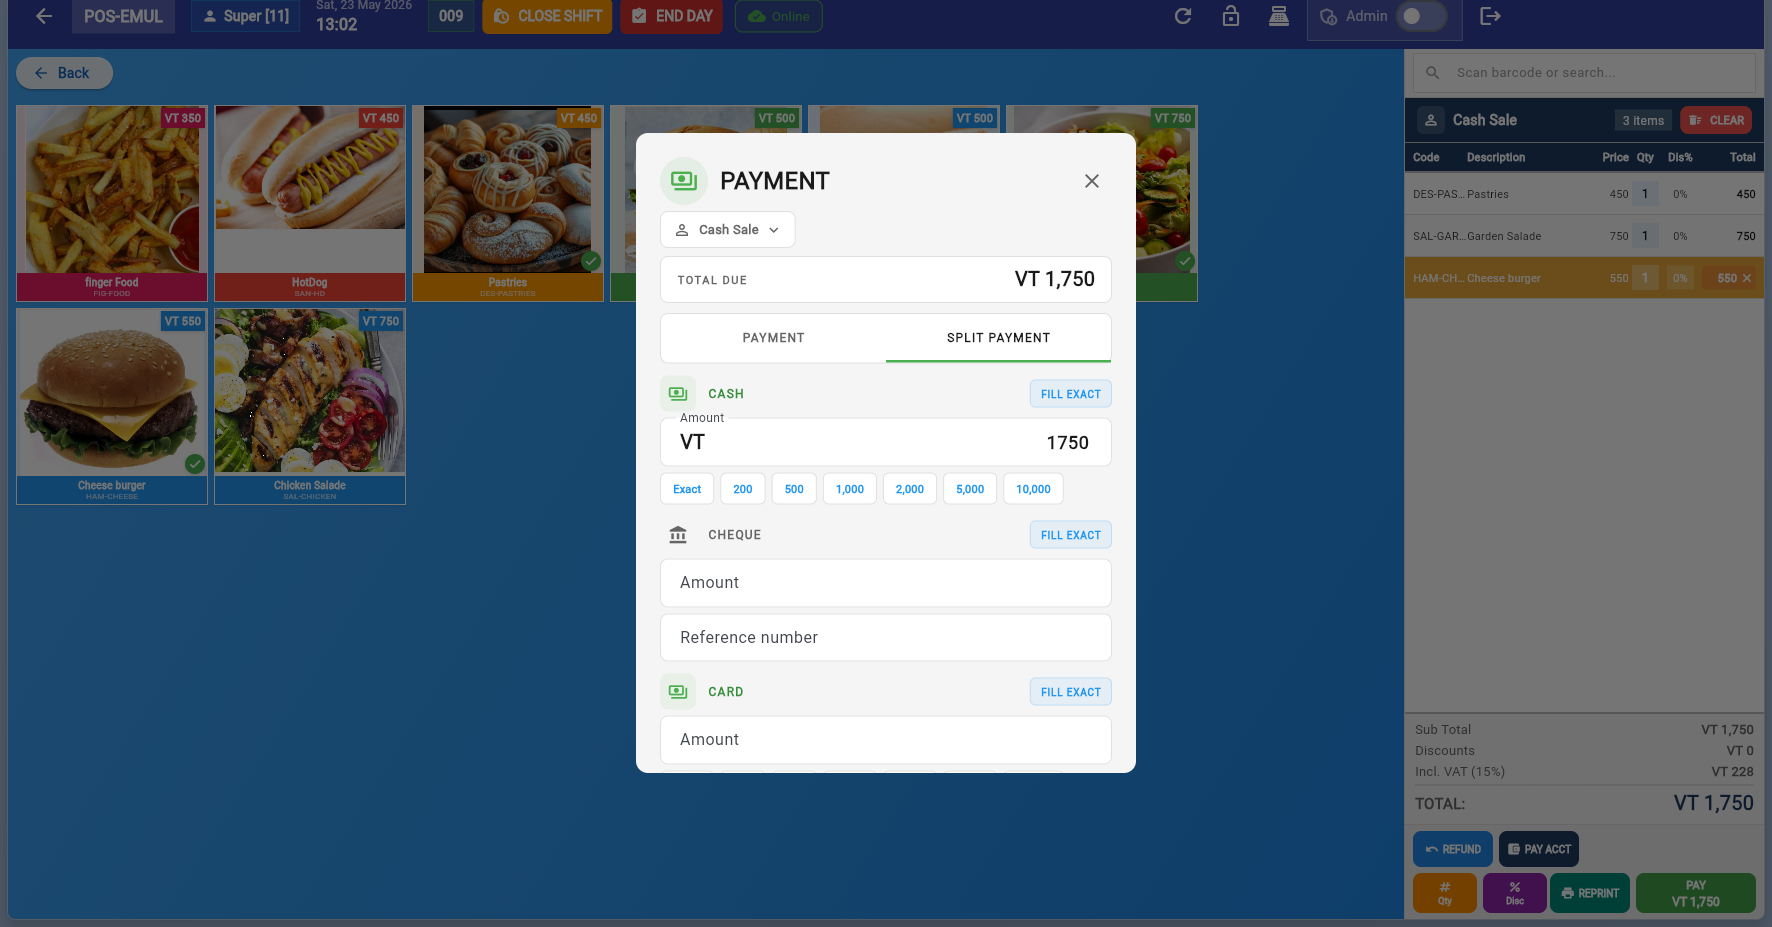
Split payment lets you divide the total across multiple payment methods. Add each method with its amount — the remaining balance updates in real time. When the balance reaches zero, you can complete the payment.