CloudPOS.vu
Product Installation Guide
🌐 Overview
CloudPOS.vu is a cloud-based Point of Sale and business management system. You can run it in a web browser on PC or use it on Android. Simply open the URL or launch the app, log in, and start selling.
The system integrates with the Vanuatu Sales Management System (VSMS) for real-time fiscal invoicing via the SDC (Sales Data Controller).
🖥️ System Requirements
🚀 Getting Started
Follow these steps to get CloudPOS.vu up and running:
-
Open CloudPOS.vu in your browser
Navigate to the CloudPOS.vu URL provided by your administrator.
-
Enter your Business UUID
Your organization administrator will provide a unique Business UUID. Enter it on the login screen to connect to your business.
-
Log in with your credentials
Enter your email and password. Your role (Cashier, Manager, Admin) determines which features are available.
-
Select your business
If your organization has multiple businesses, select the one you want to operate from the sidebar dropdown.
-
Configure VSMS (if applicable)
In Settings → VSMS, enter your ESDC URL, ESDC Token, Accreditation Number, and PIN from the TaxCore control panel. Click Test Connection to verify.
-
Set up your receipt printer
In Settings → Printers, add your thermal receipt printer. Enter its IP address and port (usually 9100). Select paper size (58mm or 80mm). Print a test receipt to confirm.
-
Add your products
In Stock → Products, add products with name, price, tax rate, and barcode. You can also import products via CSV.
-
Start selling
Open the POS screen, scan products with your barcode scanner, and process payments. Fiscal invoices are automatically signed by the SDC.
🖨️ Receipt Printer Setup
CloudPOS.vu supports network-connected thermal receipt printers using the ESC/POS protocol. Setup steps:
- Connect the printer to your local network (Ethernet or Wi-Fi).
- Find the printer's IP address (usually printed on a test receipt or via the printer's menu).
- In CloudPOS.vu, go to Settings → Printers and click Add Printer.
- Enter the printer IP address and port (default: 9100).
- Select the paper size: 58mm (31 chars/line) or 80mm (48 chars/line).
- Click Test Print to verify the connection.
📂 Barcode Scanner
Any USB or Bluetooth barcode scanner that supports EAN-13 and operates in keyboard wedge mode (HID) will work. No driver installation is needed — the scanner acts like a keyboard:
- Plug the USB scanner into your computer, or pair the Bluetooth scanner.
- When the cursor is in the POS search field, scan a product barcode.
- The barcode number is typed automatically, and the product is added to the sale.
CloudPOS.vu also supports scale barcodes (EAN-13 format with embedded weight) for weighed products.
🧾 VSMS / SDC Configuration
To enable fiscal invoicing, configure the VSMS settings from Settings → VSMS:
- ESDC URL — The endpoint URL from the TaxCore control panel.
- ESDC Token — The authentication token from the TaxCore control panel.
- Accreditation Number — Your POS accreditation number.
- PIN — Your smartcard access PIN (⚠️ maximum 5 attempts). If locked, unlock from the TaxCore control panel.
Click Test Connection to verify. On success, tax rates are automatically fetched from the SDC.
🔄 Updating the App
CloudPOS.vu is a web app — updates are deployed to the cloud automatically. However, your browser may cache the previous version. If you see a prompt to update, or if a new version has been released, follow these steps to force a reload:
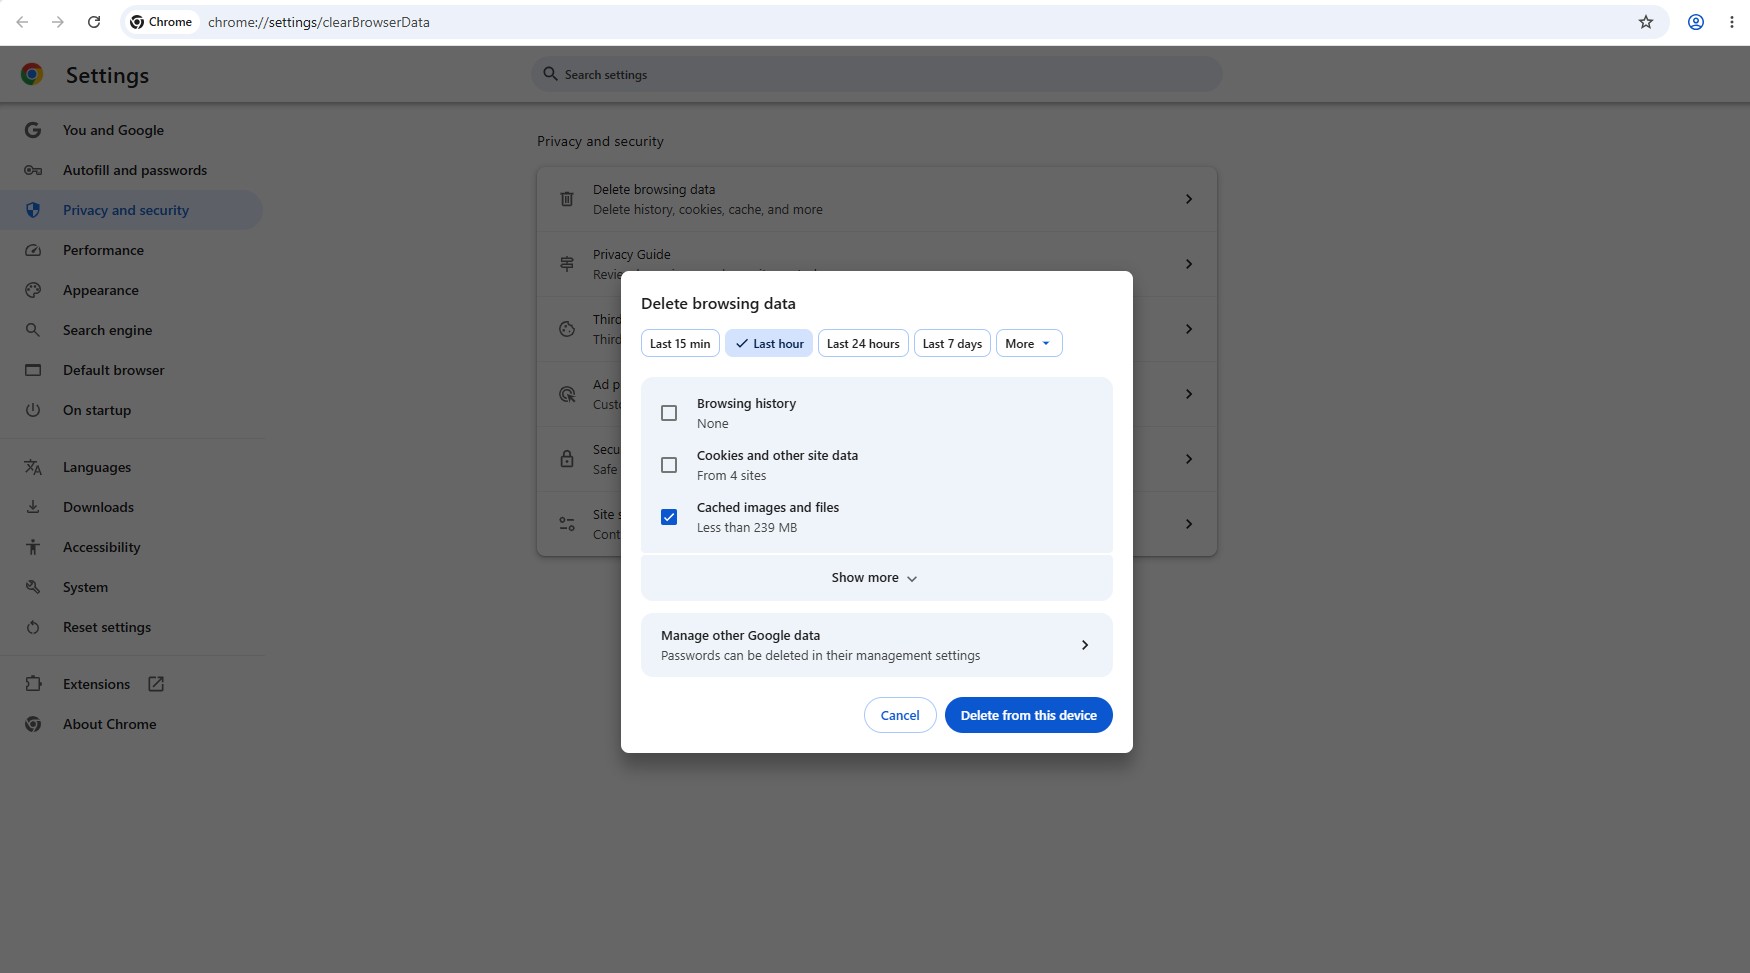
-
Open Chrome Settings
Press Ctrl + Shift + Delete (or go to ⋮ menu → Settings → Privacy and security → Clear browsing data).
-
Set time range to "All time"
In the "Time range" dropdown, select All time.
-
Tick only "Cached images and files"
Uncheck everything else (cookies, history, passwords). Only Cached images and files should be checked.
-
Click "Delete data"
Click the button. Then reload the CloudPOS.vu page — the new version will load.
📞 Support
For assistance with setup, configuration, or troubleshooting:
- Contact your system administrator
- Email: support@cloudpos.vu
Developer: ReefStack Technologies